Showing posts with label recipes. Show all posts

5.21.2016

recipe // Healthy Belgian Waffles


I absolutely LOVE these waffles, and surprisingly so does my wheat-loving husband.  Since I try to limit my overall wheat intake, these are a nice lower carb compromise for our Sunday morning breakfasts.  

I'm currently participating in the TIU Bikini Series, like I did last year, and shared a picture of these a few days ago on my Instagram.  I promised to post the recipe if any of my fellow wafflers were interested in trying them out, so here they are!

Please let me know how you like them, or if you try any modifications.  I'm interested in seeing if I can totally get rid of the wheat flour eventually.  I tried coconut flour in it's place once, but they ended up a total mess, so I'm absolutely open for suggestions!


Healthy Belgian Waffles

INGREDIENTS

1/2 cup Organic Brown Rice Flour (we use this one)
1/2 cup Whole Wheat Flour
1/2 cup Vegan Protein Powder (we use this one)
2 Tbsp. Coconut Sugar
1/2 tsp. salt
2 tsp baking Powder
1 Large Egg
1/3 cup Coconut Oil, melted 
1 1/2 cups milk of choice, lukewarm (we use unsweetened coconut milk)

INSTRUCTIONS

1. Preheat waffle iron while you make the batter according to appliance instructions.

2. Wisk together flours, protein powder, salt, baking powder & sugar.

3. In another bowl, whisk the egg, oil & milk.

4. Mix the wet ingredients into the dry, stirring until combined.  Don't worry if there are some lumps in the batter.

5. Cook as directed.

6. Serve promptly with 100% real maple syrup and/or favorite fruit.

Makes about 2.5 servings in a Belgian waffle maker, probably 3 in a standard waffle maker.


Enjoy!!


1.15.2014

recipe // savory chicken legs


A lot of times Brian and I get home from work and don't feel like spending the whole night in the kitchen...we love cooking, but we like to save those times for days off.  So when this happens, we gravitate towards quick and easy recipes.  I made it my mission to come up with a handful of these recipes to keep us from reaching for the take out menus...if you know what I mean.  We love to eat healthy and this makes it a lot easier.

I thought I'd share one of our favorites.  :)

SAVORY CHICKEN LEGS


Ingredients:

Chicken Drumsticks (Skinless or Skin On...just preference)
Extra Virgin Olive Oil
 You Fav Seasoning Mix (We love Archer Farms Savory Herb from Target - Sea Salt, Spices & Herbs including [Rosemary, Basil, Lavender] Dehydrated Onion, Natural Flavor)


What To Do:
Mix about a 1 tablespoon of seasoning with 2 tablespoons of oil 
(covers about 5 legs, use more if you have more legs...it's not an exact science, & you can't really mess it up. I usually just eyeball it).


Rub oil/seasoning mixture over legs and place on lightly oiled broiling pan. You can also use a shallow baking dish, but we find that the legs crisp up better when they're raised and the heat can circulate around the legs.  Feel free to sprinkle more seasoning on top if you think necessary.


 Bake at 375°F for 50-55 minutes, turning once halfway through.  When done, remove from oven and let cool for 5 minutes.  Then, enjoy!


Simple, right?!  

Honestly, the hardest part is waiting until they are done... becasue they are so dang delicious!  

I usually make a veggie and side while we are waiting...we love garlicky green beans and sweet potato fries (maybe some other recipe posts, perhaps..).


1.28.2013

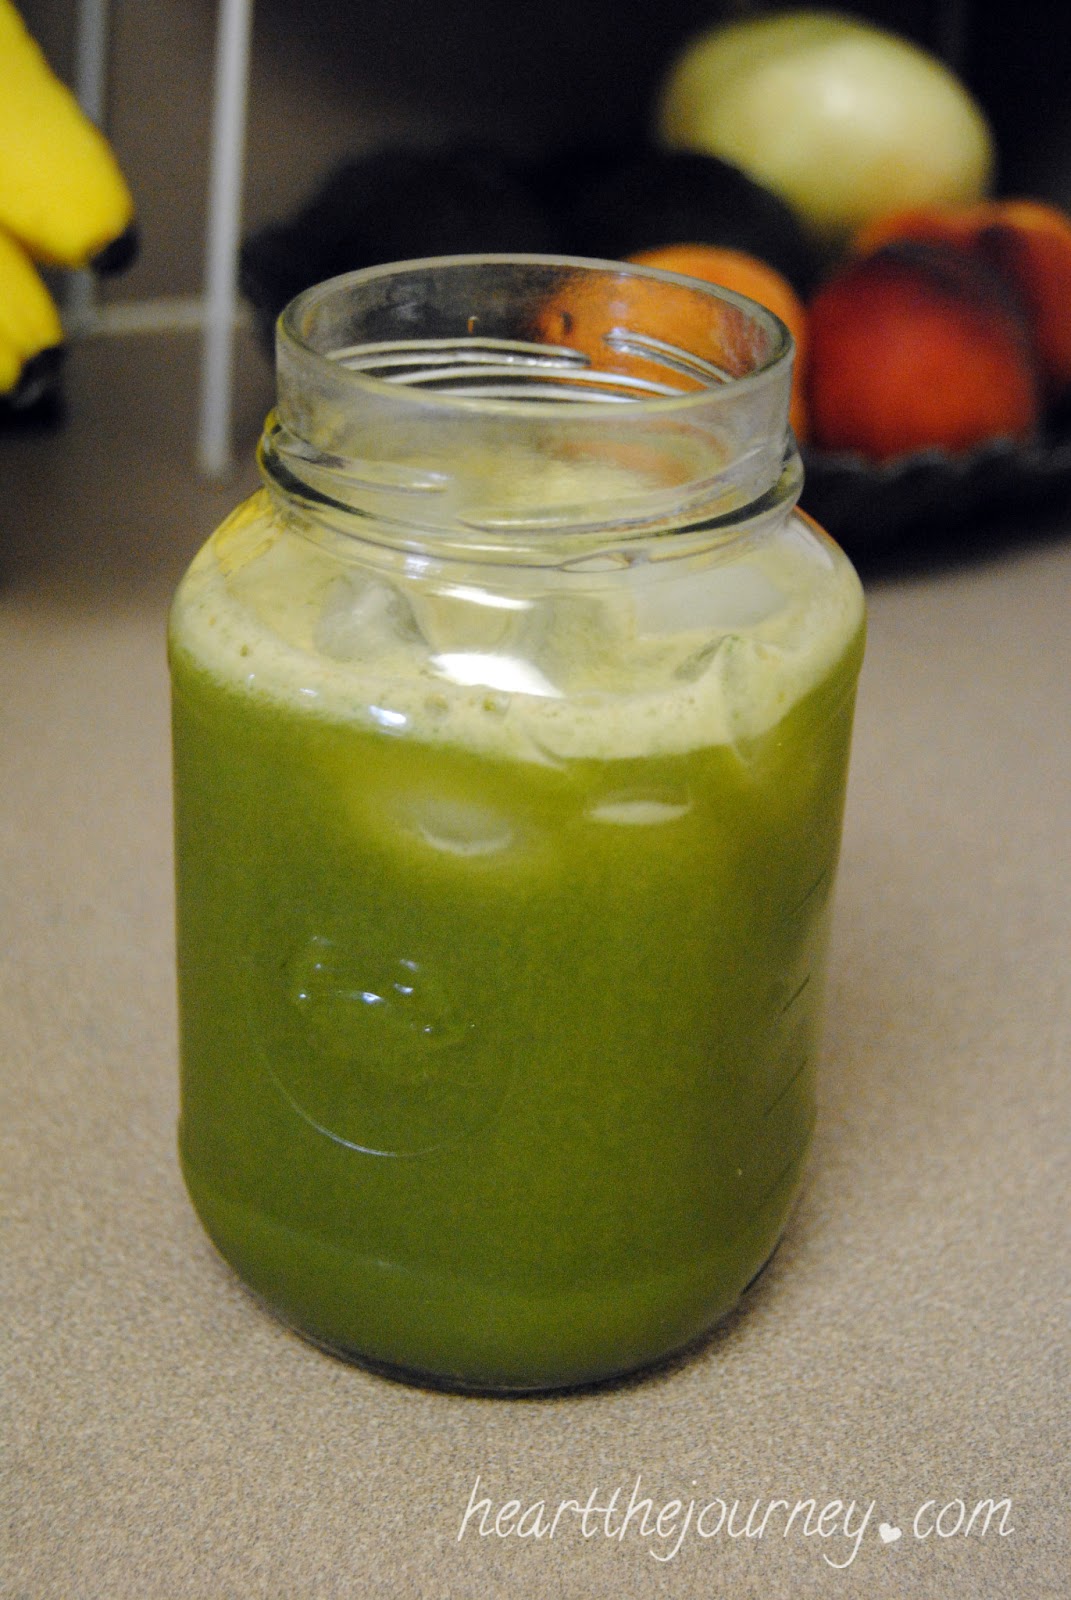
recipe // GREEN Juice


Brian and I started juicing about a year ago after we saw Fat, Sick and Nearly Dead on Netflix.  We have always tried to be healthy and eat a variety of fruits and vegetables (F&V), but honestly, and unfortunately, it's hard to eat the recommended amount - 6 to 13 servings - each day.  By juicing, you can fit way more F&V into your diet (even the ones you may not particularly care for like the green leafy kind). Plus it creates a concentrated source of valuable nutrients that can be easier for your body to absorb.  

We purchased a Jack LaLanne Stainless Steel Power Juicer Pro, which has worked really well for us.  But I've heard Breville and Kuvings are good brands too. Although we stopped for a few months (laziness), we are back to it again, since the new year.  

 Brian and I like to supplement our daily meals by adding a juice with lunch, or as a snack during the day... and we probably juice once a week or so.  I'd like to up that to 2 or 3 times a week over the next couple months.  I just need to get on a routine of buying enough fresh F&V for the whole week.  Oh, I also want to add, we still eat whole fruits and vegetables too...gotta get that natural fiber!

Anyhow, I made a delicious juice this afternoon, and thought I'd share.  Maybe it'll inspire some of you who've been thinking about juicing, to actually do it!


This green juice helps boost immunity, digestion, and cellular health.  

Don't be scared by the kale...I promise you won't even taste it!!

What you'll need (makes one 16oz serving):

4 hand-fulls of kale
1/2 medium cucumber
1 medium carrot
1 green apple
1 pear


Put all ingredients through the juicer, then pour over ice.  


Make sure to enjoy your juice immediately, since the nutrients and enzymes begin to break down relatively quickly when exposed to light and air.

And remember, there's no limit, the mix of fresh fruits and veggies is endless!  

Do you have any favorite juicing recipes??


1.24.2013

recipe // Easy Fudgy PB & Chocolate No-Bake Cookies


  The No-Bake has always been a dessert/snack fav for Brian and I, and over the years I've made many small manipulations to make it just how we like it...dark and fudgy.  Don't get me wrong, the original is good, but, in my opinion, this version really amps up the delicious factor.  

Every time I share with friends and family I get asked for my recipe, so I decided to go ahead and share for everyone to try.  Oh, and just a warning...you may be tempted to eat the whole batch before they're even cool...so watch out! :)

What you will need:

1/2 cup milk
3 Tbsp. butter  UPDATE: We use organic unrefined coconut oil in place of butter now (3Tbsp.)
1/2 cup raw turbinado sugar
4 Tbsp. special dark cocoa powder (you can use regular if you prefer)
1 tsp. vanilla extract
1/2 cup creamy peanut butter (we like Skippy Natural)
1 1/2 cup quick-cooking oats

What to do:


In a medium saucepan, combine sugar, milk, butter, and cocoa. 


Bring to a boil over medium-high heat, stirring consistently and cook for exactly 1 1/2 minutes. The timing is really important here... If you boil too long the cookies will be dry and crumbly. If you don't boil long enough, the cookies won't form properly. I suggest setting a timer for the exact 1:30.


 Remove from heat when the time is up, and stir in peanut butter and vanilla.


When the cocoa mixture and the PB are completely combined, add the oats, 1/4 cup at a time.  We like a fudgier consistency, so I usually stop at 1 1/2 cups, but if you like a firmer cookie, feel free to add another quarter cup of oats. 


Drop by teaspoonfuls onto wax paper and let cool until hardened... if you can wait that long!

If you have any leftovers, these babies will last 3-5 days stored in an airtight container in the fridge.


Enjoy!


1.21.2013

The Beauty Benefits of..... Apple Cider Vinegar


from here

Oh, it can be used for much more than just dressing salads, my friends.  This cheap, all-natural kitchen staple can help make you b-e-a-utiful.  It's been used for centuries for a variety of things, but lately I've been using it as a all-natural hair conditioner and facial toner... and I though I'd share!

 Harsh soaps and chemical-laden shampoos strip hair and skin of its natural oils, which leaves you feeling dry all over (this can sometimes cause an overproduction of natural oils to make up for the dryness -- no good!).  Apple Cider Vinegar, with it's ideal acidity level, counteracts that process and actually balances your skin and hair's natural pH levels.  
Now, you need to make sure that you get the good stuff though. Organic Raw Apple Cider Vinegar (ORACV) has the most benefits, due to it's inclusion of 'mother'.  Mother is a dark, cloudy, foam that contains many minerals and trace elements such as potassium, calcium, magnesium, phosphorous, chlorine, sodium, sulfur, copper, iron, silicon and fluorine, all vital for body health.  I know, I know, it doesn't sound very pretty, but the effects of using it will be.  I've been using Tree of Life Raw Organic ACV, but there are many great brands out there.  You can find them at most health food stores and some grocers.


Natural Hair Conditioner Rinse
 
from here
 
  Months ago, I learned that ORACV can be used as a rinse for hair, so I've been using it once or twice a week since then.  It removes product buildup, which clarifies hair and increases body. It also closes the hair cuticle so light reflects off of it...giving way to super shiny locks!  It's like a hair recharger.  

To relive smoother hair days, mix the equal parts ORACV and water together. After shampooing, pour the mixture into your hair.  If you have a spray bottle, that works even better. Massage it into your scalp. Let the apple cider vinegar sit for a few minutes before rinsing fully with water. You can finish with a light conditioning, but there's really no need to use conditioner. The apple cider vinegar will leave hair feeling smooth and soft.


Natural Facial Toner

from here

  About two weeks ago, I started using ORACV as a morning and night toner.  I heard somewhere (unfortunately, I can't remember) that it is good at combating acne and discoloration (both of which I had at the time).  Also, because skin is naturally acidic, ORACV can help restore your skin's natural pH balance, leaving it at an optimum level between oily and dry.  So far it has cleared up my small blemishes in record time (days instead of a week or more) and I feel it has even lightened some of my darker freckles and lessened my ruddiness.  All wins, yippee!
  
To use as a daily toner, mix one part apple cider vinegar with two parts water (I like distilled).  If you have really sensitive skin, you may want to dilute the solution further.  After naturally cleansing morning and night, I squirt a bit of the mixture on a cotton round and smooth all over my face.  This will leave a light layer on the skin, locking in moisture.  Don't worry, the vinegar smell will dissipate after a few minutes.  To finish,  I lightly moisturize with Jojoba oil.

(Always remember to do a skin test first to make sure your skin is not too sensitive -- even with an extra diluted version. Place a small amount on your neck and leave it on for 15 minutes. If you do not see any reaction then you can apply it directly to your face.)

________________________


These are the two ways I use ORACV right now, but below are other interesting uses that I found...some that I can't wait to try!

For Sunburn Relief  //  Add a cup of apple cider vinegar to your bath, and soak for 10 minutes.

As a Natural Aftershave (for the guys)  //  Fill a bottle with equal parts apple cider vinegar and water, and shake before applying to the face. 

To Reduce Allergies and Illness  //  Research suggests that ORACV can help with allergies because of its ability to reduce mucous and sinus congestion. When reducing the effects of allergies, it can also help stave off sinus infections and their related symptoms (sore throats and headaches).  Drink at least 2 tablespoons mixed with 8 oz of water daily.  You can also add a tablespoon of organic honey or stevia if it tastes too bitter for you. **

As a remedy for bad breath  //  Due to its antiseptic properties, it makes a wonderful remedy for bad breath or halitosis. Simply add 2 teaspoons of ORACV into a cup of water and gargle the mixture in your mouth for 10 seconds at a time and spit the solution out. Repeat until the cup is empty.  

To Eliminate Body Odor  //  It can help adjust the skin's pH level which helps to eliminate odor-causing bacteria. For armpit odor, simply wipe them once each morning with undiluted apple cider vinegar (using a cotton ball). For foot odor, fill a pan with warm water and add 1/3 cup of ACV, then let your feet soak in this mixture for 15 minutes once per week.

 To Alleviate Heartburn  //  Mix 2 tablespoons ORACV in 8 oz of water, taken three times a day before meals. **

AND EVEN As Flea Prevention on Pets  // A mix of one part vinegar and one part water can be sprayed on your pets fur and rubbed in generously to the skin. Saturate the entire coat, and continue every day for a few days to a week. Any flea infestation should vanish. 

Feel free you send me an email or post a comment below with any questions.  

How do you use your Organic Raw Apple Cider Vinegar?


**Please consult a physician if you are taking any prescription medications or if you have any serious ailments, 
before starting any oral ORACV regimen.  

1.13.2013

DIY // homemade body scrub

I really like Tree Hut's Shea Sugar Body Scrub in Tropical Mango.  It's a pretty natural option and that's why I've been using it (plus it smells really yummy!).  But since I've switched to an all natural skincare regime, I thought...why not use an all natural and homemade body scrub as well... one that includes the nourishing oils, but not all of the chemicals.  It can't be that hard and it definitely has to less expensive.  So I decided to try it, and better yet, give it as Christmas gifts.  Well, it's been unanimously praised so I thought it time to share.  :)

Honestly, this is one of the easiest homemade beauty recipes I've tried (more to come on that).  It only takes 5 minutes with items you probably already have in your kitchen.  I found several recipes in my Google search that severed as inspiration for my own recipe.  The possibilities are nearly endless however: variations of salt, sugar, oil and essential oils abound, so it is easy to formulate your perfect scrub. I stuck to sugar this time...but I think I may experiment with salt next! 

 I actually made 4 sugar based scrub varieties in total; the other three, I will list at the end of this post, but the easiest is definitely the Brown Sugar Vanilla.  This scrub smells just like a sugar cookie and has a medium grain for a moderate scrub.  More white sugar produces a finer scrub, good for sensitive skin, and more raw sugar produces a coarser scrub, good for rough areas like elbows and knees & not as ideal for sensitive areas.

This recipe makes about 16 ounces of scrub and isn't too runny or too dry, but somewhere in the middle. If you like a runnier consistency just add extra tablespoons of oil, one at a time, until you are satisfied.


WHAT YOU WILL NEED: 

1/2 cup brown sugar 
1/2 cup white sugar (pure cane
1/4 cup raw sugar (organic turbinado
5 tbsp sunflower oil 
4-6 drops vanilla extract


Add all of the sugars and vanilla to a small bowl.  Mix well, breaking up any clumps.  

Add the oil and mix to fully hydrate the sugar.  

Allow to sit for about 5 minutes, so oil can fully saturate the grains; mix again and adjust amount of oil or sugar if necessary (you want a pretty thick mixture; ideally the scrub should hold together if you pick up a dollop in your hand, but should not be so wet that oil is dripping). 


 Package in a clean jar (I used 16oz Ball Glass Preserving Jars from target).  

Now, you can jump right in for personal enjoyment or decorate with a bow and cute tag and give as a gift like I did.


Here are the other varieties that I made:


 Cinnamon Vanilla Brown Sugar Body Scrub (top)
1/2 cup brown sugar 
1/4 cup white sugar (pure cane
1/2 cup raw sugar (organic turbinado
6 tbsp apricot kernel oil
3-4 drops vanilla extract
several dashes of cinnamon

Lavender Vanilla Body Scrub (left)
1 1/4 cup white sugar (pure cane
1/2 cup raw sugar (organic turbinado
1 t lavender buds (dried)
7 tbsp sunflower oil 
1-2 drops vanilla extract

Coffee Body Scrub (right)
1 cup white sugar (pure cane
1/2 cup raw sugar (organic turbinado
1/4 cup coffee grounds 
7 tbsp apricot kernel oil
1-2 drops vanilla extract


 Well, I hope you will try this out.  It's a wonderful spa treatment right at home, that will only set you back about $3.50 for the whole 16 ounces including the mason jar (compared to Tree Nut at $7.49 for 18 ounces). When a refill will only cost about $2.60 (since I already have the jar),  I'd say I've found 
a permanent addition to my beauty arsenal!

Enjoy!


12.24.2012

HOLIDAY JOY & almond joy chocolate bark


Merry Christmas!!

from here


After a nice dinner and making one more batch of Almond Joy Chocolate Bark for tomorrow, Brian and I, and the pups, are about to settle on the sofa to watch yet another Christmas-y movie tonight (Last night...Elf!).  Obviously, I will have my cup of green tea and Brian will inevitably steal several bits of the bark... this is our contentment. 

Tomorrow morning we will pack up the pups and the presents and head over to my parents' house, to eat a traditional breakfast spread that includes biscuits and eggs, and exchange gifts. Then we all will head up to my Aunt and Uncle's for an Italian Christmas dinner with my dad's extended family... Although it used to be at my grandparent's, the get-together is a more than 27 year tradition.  I it.  :)


Wishing you abounding holiday joy and good times with the ones you love!


12.07.2012

recipe // crispy garlic parmesan edamame

I recently found an intriguing recipe during one of my all-too-often Pinterest raids. 

Crispy Garlic Parmesan Edamame.


Now if you were like me, you are probably saying, "What the heck is edamame, exactly?"  Well, it's basically just immature soybeans in the pod, and they are actually called mukimame when they are sold as individual beans.  They are a really good source of healthy carbs, protein, fiber and nutrients...the perfect snack!

In need of a healthy afternoon pick me up, I decided to make said recipe.  It's very easy and was soooo yummy, that I just had to share.  My version is a slight variation of this one.

INGREDIENTS
  • 1 package frozen shelled edamame (or already shelled mukimame)
  • 1½  tbsp olive oil
  • ¼ cup grated Parmesan cheese
  • ¼ tsp garlic powder
  • ¼ tsp cayenne pepper (I like mine spicy)
  • salt and pepper to taste
DIRECTIONS
  1. Preheat oven to 400 degrees.
  2. Cook the edamame according to the package. Usually along the line of boiling for 4-6 minutes. Let cool until the edamame no longer gives off steam.
  3. Mix parmesan cheese, garlic powder, salt and pepper in a bowl. In separate bowl, toss edamame with olive oil.
  4. Add the parmesan-spice mixture to the edamame and toss until evenly coated.
  5. Spread onto lightly sprayed pan and bake for 15 minutes (until cheese is crispy).
  6. UPDATE: Let them cool on the baking sheet after taking them out of the oven (before dumping into a bowl). This seems to helps them to crisp a bit more.


I hope you enjoy!