Showing posts with label food. Show all posts

5.21.2016

recipe // Healthy Belgian Waffles


I absolutely LOVE these waffles, and surprisingly so does my wheat-loving husband.  Since I try to limit my overall wheat intake, these are a nice lower carb compromise for our Sunday morning breakfasts.  

I'm currently participating in the TIU Bikini Series, like I did last year, and shared a picture of these a few days ago on my Instagram.  I promised to post the recipe if any of my fellow wafflers were interested in trying them out, so here they are!

Please let me know how you like them, or if you try any modifications.  I'm interested in seeing if I can totally get rid of the wheat flour eventually.  I tried coconut flour in it's place once, but they ended up a total mess, so I'm absolutely open for suggestions!


Healthy Belgian Waffles

INGREDIENTS

1/2 cup Organic Brown Rice Flour (we use this one)
1/2 cup Whole Wheat Flour
1/2 cup Vegan Protein Powder (we use this one)
2 Tbsp. Coconut Sugar
1/2 tsp. salt
2 tsp baking Powder
1 Large Egg
1/3 cup Coconut Oil, melted 
1 1/2 cups milk of choice, lukewarm (we use unsweetened coconut milk)

INSTRUCTIONS

1. Preheat waffle iron while you make the batter according to appliance instructions.

2. Wisk together flours, protein powder, salt, baking powder & sugar.

3. In another bowl, whisk the egg, oil & milk.

4. Mix the wet ingredients into the dry, stirring until combined.  Don't worry if there are some lumps in the batter.

5. Cook as directed.

6. Serve promptly with 100% real maple syrup and/or favorite fruit.

Makes about 2.5 servings in a Belgian waffle maker, probably 3 in a standard waffle maker.


Enjoy!!


4.19.2015

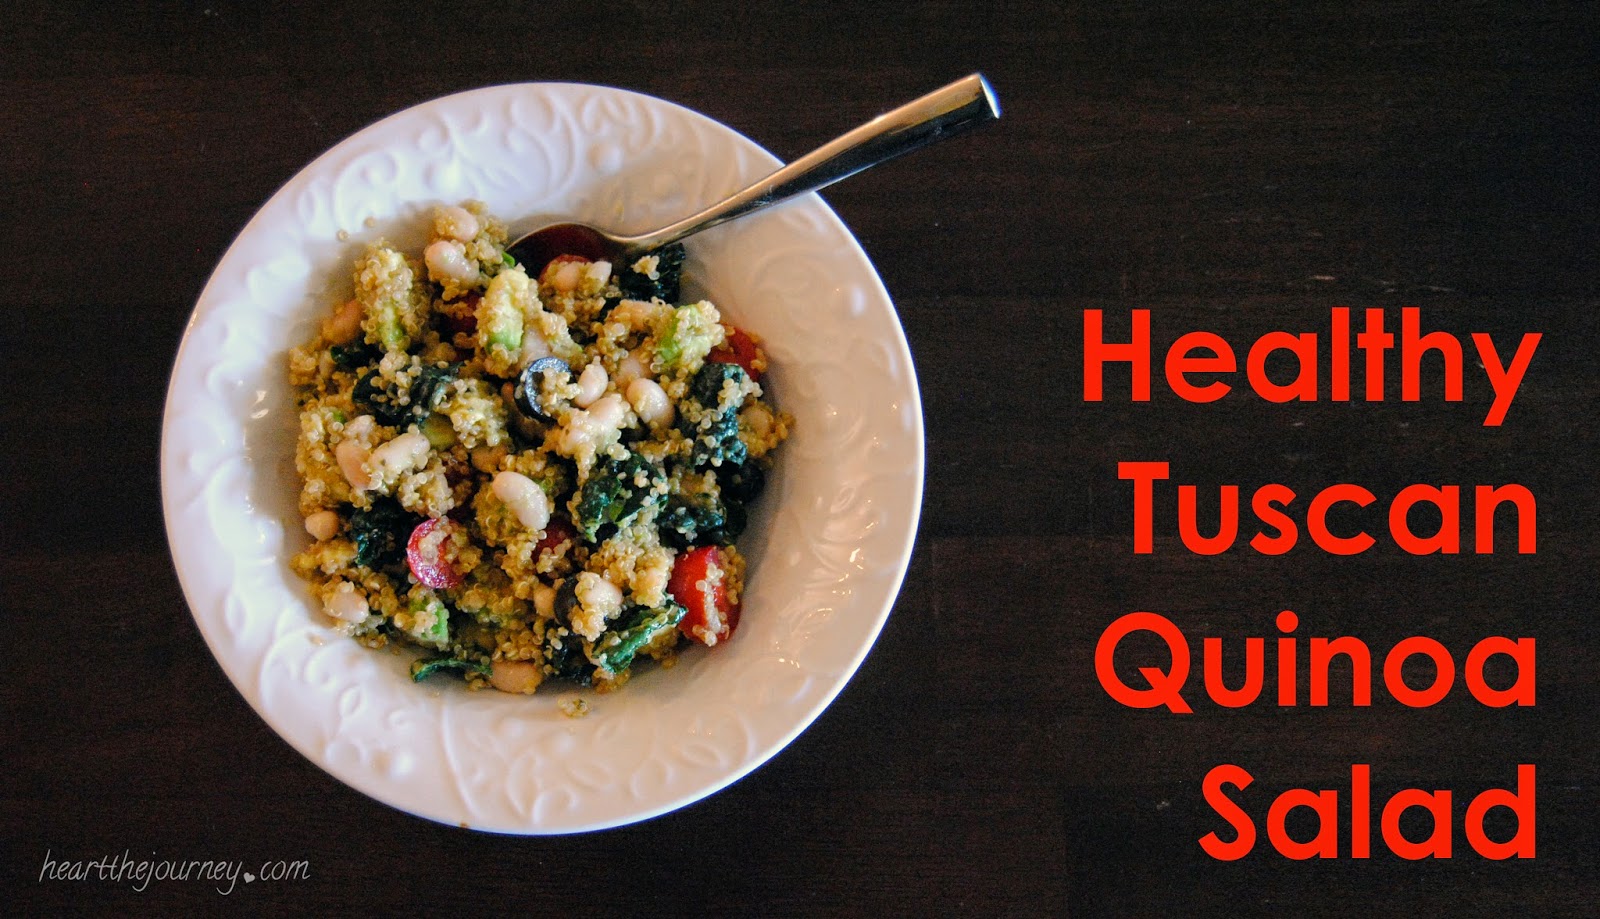
recipe // Tuscan Quinoa Salad


I've been making a variation of this salad for several years but this is my favorite way to make (and eat) it.

It's super quick to whip up and, even better, it's so, so good for you!  Plus it's Tone It Up approved!!

Kale is a leafy green cruciferous vegetable that is chock-full of essential vitamins A, C and K as well as minerals like copper, potassium, iron, manganese and phosphorus. A cup of fresh kale has only about 40 calories but packs almost 3 grams of protein. One cup of cooked kale has over 1000% more vitamin C than a cup of cooked spinach and unlike spinach, kale's oxalate content is very low which means that the calcium and iron in kale are highly absorbable in the human digestive system.
The high monounsaturated fat content of olives has been associated with reduced risk of cardiovascular disease. Diets rich in monounsaturated fat have been proven to decrease blood cholesterol, LDL cholesterol, and LDL:HDL ratio. Recent research studies have also shown that the monounsaturated fat found in olives (and olive oil) can help to decrease blood pressure. In terms of their phytonutrient content, olives are nothing short of astounding. Few high-fat foods offer such a diverse range of antioxidant and anti-inflammatory nutrients—some of which are unique to olives themselves. This may also make them a powerhouse of protection against cancer because chronic oxidative stress and chronic inflammation can be key factors in the development of cancer.

Avocado is another great source of monounsaturated fat, antioxidant and anti-inflammatory nutrients; all of which aid in proper body functions. This
monounsaturated fat and the avocado's high fiber content makes it great for weight loss. Research has shown that monounsaturated fatty acids are more likely to be used as slow burning energy than stored as body fat. Plus, one cup of avocado provides about 7-8 grams of dietary fiber, making it excellent at regulating blood sugar. This slow burning energy and the feeling of satiety or satisfied fullness that you get from eating an avocado is one of the reasons they are known for reducing hunger and appetite. Avocado is also great for nourishing and increasing cellular turnover in skin.

Tomatoes are a rich source of vitamins A and C and folic acid. They contain a wide array of beneficial nutrients and antioxidants, including alpha-lipoic acid, lycopene, choline, folic acid, beta-carotene and lutein, which may lower your risk for developing cancer, high blood pressure, heart attack, diabetes, depression... even wrinkles and constipation.

Kidney beans (includes Cannellini) are a very good source of cholesterol-lowering fiber, as are most other beans. In addition to lowering cholesterol, kidney beans' high fiber content prevents blood sugar levels from rising too rapidly after a meal, making these beans an especially good choice for individuals with diabetes, insulin resistance or hypoglycemia.  When combined with whole grains such as rice, kidney beans provide virtually fat-free high quality protein. Kidney beans are also an excellent source of molybdenum, folate, manganese, phosphorus, protein, vitamin B1, iron, potassium, magnesium, fatty acids, and amino acids. All of these key nutrients contribute to good overall heart health.

Quinoa is naturally gluten-free and contains iron, B-vitamins, magnesium, zinc, phosphorus, potassium, calcium, vitamin E and fiber. It is one of only a few plant foods that are considered a complete protein and comprised of all pernine essential amino acids. Botanically, quinoa is actually not classified as a grain. It is a pseudo-cereal (a non-grassy plant used in much the same way as cereals and grains with a similar nutritional profile). The seeds of pseudo-cereals can be milled and ground into flour just as other grains and cereals. It provides a variety of antioxidant phytonutrients, antioxidant flavonoids, and anti-inflammatory polysaccharides. The antioxidant and anti-inflammatory phytonutrients in quinoa also make it a likely candidate for cancer risk reduction in humans. Many studies have shown that as whole grain intake increases, the risk for cardiovascular disease, diabetes, High BP, colon cancer & obesity decreases.

So now that you know a little bit more about the amazing ingredients in this salad, let's get to the recipe!

______________________________

WHAT TO GET


SALAD:

1 cup uncooked quinoa (any variety)
1 1/2 cups water or broth
Pinch of Sea Salt
1/8 t Cumin
1/8 t Smoked Paprika
1/8 t Garlic Powder

1 large Avocado - diced
3/4 cup Cherry Tomatoes - halved
1/2 cup Black Olives - sliced
3/4 cup Tuscan Kale leaves (I found mine at Trader Joe's) - ripped into bite sized pieces
1 can Cannellini Beans - rinsed & drained

DRESSING: 
Juice of half a lemon
1/4 cup Olive Oil
1/4 t Sea Salt 
1/4 t Pepper
Sprinkle of Cilantro
  

WHAT TO DO

1  //  Cook quinoa via package instructions. I mix quinoa, broth, sea salt, cumin, garlic powder & paprika in saucepan, bring to a boil then lower to a simmer for 15 minutes.

2  //  While quinoa is cooking, prepare remaining salad ingredients and add to a mixing bowl.  


3  //  When quinoa is done, remove from stove and put into a bowl to cool.

4  //  While quinoa is cooling, prepare dressing.  Combine all dressing ingredients in a separate bowl and whisk to combine.


5  //  In a large bowl or container, add quinoa, dressing and other salad ingredients all together and GENTLY fold to combine.

6  //  Enjoy!


I'm not sure how many servings this makes (I tend to eat it right away out the bowl and then it's hard to tell), but I know it will yield quite a few 1 cup servings... maybe 6?  

This is one of those recipes that is easy to play around with though, you can't really mess it up.  So definitely feel free to subtract anything you don't care for and add anything else you do (like goat cheese, how amazing does that sounds??). 

Let me know if you give this recipe a try and what you think!


3.14.2015

haul // Vitacost & Lucky Vitamin


If you're not familiar with Vitacost, it's a website that sells a large selection of discounted beauty & personal care, health & wellness, food, and home products, most of which are natural.  They often have sales and if you belong to Ebates, they offer 4% cash back when you shop on Vitacost.com.  Vitacost also offers free shipping for orders over $49.  Since I only buy from there every two months or so, I definitely meet that threshold. Lucky Vitamin is a similar website that sells many of the same things as Vitacost, but also some that differ... hence, why I made an order from both.

If you missed it, I shared my first Vitacost order here.  Again, I enjoy seeing what other people purchase, so I thought I'd share what I buy in case anyone out there is as nosy as I am.  ;)  And I also think it's a quick way to get some ideas on new things to try.

You may see a few repeats, but I have quite a few newbies in here as well.  Okay, let's get started with the items from Vitacost!

[ from left to right ]


1. Devita Age Defying Moisturizer - 2.5 fl oz - $19.99 - I've previously used the Devita Solar Protective Moisturizer SPF 30, which is a really nice moisturizer for day, so I figured this would be a great am or pm moisturizer.  It's light and a bit more sheer than the Solar option.  I can't really comment for the "Age Defying" part yet, but so far I really like it.  I've been using it in the mornings since it's wintery & cloudy most days right now.  If you're looking for a light moisturizer without sunscreen that has fantastic natural ingredients, give this a try.

2. Acure Organics Argan Oil - 1 fl oz - $6.99 - First off, what a great price, especially since they sell this at Target and health food stores for $11-$12.  I have previously used Josie Maran Argan Oil and liked it just fine, but it's $16 for .5 fl oz... yeah, that's a lot.  So after finishing the JM one I went in search of a better option on Vitacost... and this is what I settled on.  It's still organic and has all the wonderful skin/hair benefits, but with a much better price tag.  I have replaced my jojoba oil, am & pm, with this Argan oil for about the last 2 months (I have already gone through 2 of these!) and now use it just at night after I cleanse and apply serum.  My skin drinks it up and I feel like my skin texture is smoother and more plump.

3. Kiss My Face Creamy Face Cleanser Clean For A Day - 4 fl oz - $9.69 - I had heard several natural beauty bloggers mention this cleanser, one of which is Shannon Sullivan, and rave about it.  Now I can see why.  It has pure and organic ingredients, is super gentle and smells like a creamsicle! I have been using this in the morning with my new Dr. Sponge (see below) and the combo leaves my face feeling amazing.  It's clean, but not tight or squeaky. I don't use this at night so I can't say, but it supposedly removes make up too.

4. Aura Cacia Nourishing Organic Cocoa Butter - 4 fl oz - $5.29 - I purchased this item to use in my DIY recipes, specifically my homemade deodorant (which I will be sharing shortly!). It's 100% organic, certified fair trade and deeply nourishing for skin, plus it smells like chocolate!

5. Heritage Products Rose Petals Rosewater Body Splash - 8 fl oz - $5.99 - This was my third fourth time purchasing this rose water, becasue I LOVE it so much.  It smells great (if you like roses) and it moisturizes my skin so well.  It really drinks it up.  I spray this on my face after cleansing and after applying my mineral makeup.  I also spray it on during the day if my face is feeling parched or my makeup is looking a little dry.

6. Nourish Tea Organic Happy Matcha - 80 g - $22.49 - I have been wanting to try matcha green tea for some time.  I'm not sure what held me back but, after talking to a friend who had just started to drink it and loves it, I decided to give it a try.  And, whadda ya know, I love it too!  It's creamier than my regular loose-leaf green tea and a much deeper green.  This brand is 100% organic and also very finely ground so there is no grittiness what-so-ever.  I love that I'm now getting the full benefits of the leaf. 

7. Andalou Naturals Turmeric plus C Enlighten Serum Brightening - 1.1 fl oz - $19.99 - This is another one of those products I have seen several natural vloggers talk about.  Brianna from iluvjesse444 mentioned how it has helped clear her face of excess redness.  Well, I have the same issue and it has some amazing ingredients, so I thought I'd see what it can do for me.  I apply it am & pm right after cleansing and before moisturizing. 

8. NuNaturals Pure Liquid™ Clear Stevia™ Glass Bottle - 2 fl oz - $9.49 - This is now my fourth time ordering this.  I've completely switched from stevia packets (unless I need to bring it with me) to this clear liquid stevia.  I use it in my tea, oatmeal, homemade jam and in baking.  It works great and there is no bitter aftertaste. 

9. Acure Organics Brightening Facial Scrub Sea Kelp plus Chlorella Growth Factor - 4 oz - $7.89 - Okay, I don't want to be redundant, but this was another product that got great reviews on YouTube.  I'm kind of a facial scrub snob, if you will.  A scrub must have a lot of very fine granules for me to use it more than once.  I don't care for those scrubs that have only a few granule bits here and there or the ones with soft exfoliating spheres (seriously, we know they don't do anything to dry skin bits).  So when this one got so much attention and I heard someone describe it to my liking, I had to give it a go.  I've only used it twice so far, but I really like it.  Besides the awesome green color and the great health benefits of the ingredients, it also feels more like the scrubs I desire.  I plan to use it about 2 times a week, so we'll see if it helps to deep clean and brighten my face.

10. Honey Gardens Organic Raw Honey - 16 0z - $13.09 - Well.  To be completely honest, I ordered this honey because my fav {Madhava Natural Sweeteners Organic Very Raw Honey} was out of stock. :( But I have to say this one is also raw, organic and very tasty.  I mostly use it for washing my face, so this one seemed a good second choice.  Since ordering this though, I have stopped washing my face with honey and only use it in DIY masks.  I think when I finish this jar I want to try real Manuka Honey for it's even more amazing health benefits.

 11. Nature's Way Alive!® Once Daily Women's Multi-Vitamin Ultra Potency - 60 Tablets - $10.99 - I've been taking these for around a year now and I love them.  I've actually lost track of how many I've ordered.  If you're looking for a natural whole food vitamin that isn't too expensive, try this one out.

11. Vitacost Extra Virgin Certified Organic Coconut Oil (Non-GMO) - 54 oz - $23.99 - I LOVE this coconut oil.  We use so much in cooking and personal care that I like to get the largest size I can, especially since coconut oil has pretty much an infinite shelf life.  After trying several other brands I found this one on Vitacost and haven't purchased anything else since (it also lasts forever, this is only our second one).  It's unrefined, organic and non-GMO, which is what I look for in my oils.  It's also a great price, considering others I've tried were about $10 for 16 oz.

12. Andalou Naturals 1000 roses Rosewater mask Sensitive - 1.7 fl oz - $11.96 - This is another new item I've heard great things about.  I have dry, sensitive skin, especially during the winter.  Sometimes I feel like I could use a hydrating mask, as opposed to a clarifying one, so I decided to give this a try.  I'm glad I did, it makes my skin so smooth and plump.  Plus, it smells subtley of roses and has a fun whipped texture.

 
Okay, now for the items from Lucky Vitamin...


[ from left to right ]

 
1. NOW Foods Rose Hip Seed Oil - 1 oz - $4.48 - I purchased this to use in an all natural beauty DIY that I hope to share on here soon. 

2. Dr. Bronners Magic Pure Castile Soap Organic Rose - 16 oz - $9.89 - I've been purchasing Dr. Bronner's castile soaps for years now, they are great.  I jut ran out of my lavender scent (the peppermint is wonderful too) and have been wanting to try the rose, so I got it!  I use this stuff quite a bit... as a hand soap and in DIY cleaners, but there are many more uses out there.

3. YS Organic Bee Farms - Fresh Bee Pollen Whole Granules - 16 oz - $16.89 - I recently read about bee pollen and it's role in treating allergies when taken orally (among other things) and thought I would give it try.  I have terrible seasonal allergies and would love to lessen there blow to my system.  I've just started working my way up to the recommended dosage, so I'll let you know what I think after I have been taking it for a bit.

4. LuckyVitamin Natural Vitamin E 200 IU - 100 Softgels - $6.99 - I also purchased this for a beauty DIY, coming soon!

5. Giovanni - Shampoo Colorflage Daily Color Defense Perfectly Platinum - 8.5 oz -  $6.07 - A couple of weeks ago, I ran out of the violet shampoo I have been using for the past few years.  It was not a natural brand and have been planning to find a more natural option once it ran out... problem was, it was a huge bottle I got in a sale at Ulta years ago and the frugal side of me couldn't throw it away until it was done.  Anyhow, I ran across this Giovanni option and decided to give it a try.  It's still not the most natural but it's not nearly as toxic as the previous one I was using (according to the EWG's cosmetic database).  

6. Dr. Sponge - Konjac Facial Sponge Original - 0.3 oz - $7.88 - I know I'm starting to sound like a broken record, but this was another item I had heard several vloggers talk about.  Most mentioned that it was a plant-based facial sponge that gave extra gentle exfoliation.  With my dry skin, I feel like I need to exfoliate daily, but my Clarisonic or even a washcloth was a bit too harsh for that, so I was all about trying this.  I will say that after using it every morning for the past two weeks, I don't ever want to be without this sponge... ever. again.

 _______________________ 

 Well, that was everything!  Again, I hope you enjoyed this kind of post.  If you have any questions about anything I've shown here, please leave me a comment below and I'd be happy to give you more of my thoughts!

_______________________

Websites like Vitacost & Lucky Vitamin have the best selection of vitamins, herbs, supplements I have found.  Better yet, they offer discounts of up to 75% on over 30,000 items, and free shipping on orders over $49.

If you're interested in placing an order with Vitacost and/or Lucky Vitamin, feel free to use my links below:

 Vitacost - save $10 off you first purchase! 
Lucky Vitamin


And if you'd like to sign up for Ebates please use my friend referral link.


7.15.2014

recipe // Gluten-Free Coconut Flour Pizza Crust


I'm not really allergic to gluten (or at least it hasn't been confirmed by a doctor), but I do think I have somewhat of a gluten intolerance.  Let's just say that if I eat too much, my digestive tract hates me.  All in all, I've been able to avoid pasta and sandwiches (for the most part), but I've had the hardest time giving up PIZZA.  It's probably one of my all time favorite foods.  Because of this, I have definintely eaten some even after I realized my body's hate for gluten, and every time I remember why I shouldn't.  So, except for the occasional Mellow Mushroom, I've been really trying to avoid it.  

That's lead me to a search for a gluten free crust recipe that I can make at home.  Needless to say, it's quite a daunting task.  I've tried so many that failed, like the cauliflower version that's roaming around Pinterest, until this past week.  I found one that is simple to make, and crisps up like regular dough.  It's pretty darn amazing in my book.  So for all you other Ex-Gluten people out there who want some delicious pizza, I thought I'd share.  I did add a few extras, but the main recipe is from another Katie (www.thischickcooks.net) who says she originally got it from another source but couldn't remember who.  So if you know, please let us know so we can give them a shout out!  :)

Okay, enough chit chat, let's get cooking!


What You Need

1 cup shredded mozzarella cheese  (The full fat type works best)
1 large egg
1 tablespoon cream of buckwheat  (or flax meal - this is what I use)
1 tablespoon coconut flour
1/8 teaspoon baking soda
1/4 teaspoon basil  (optional)
Pinch of cayenne  (optional)
Pinch of garlic powder  (optional)


What To Do


1. Preheat oven to 425.
2. Mix all ingredients in a bowl until well combined.
3. Line a cookie tray with parchment paper, or use a SILPAT like I did, and spread the cheese mixture on the paper/SILPAT as thinly as possible, using the back of a spoon or fork.
4. Reduce heat to 400 and bake on the top rack for 12-15 minutes, or until the crust is starting to look golden in places.  Remove from the oven and add desired toppings.
5. Bake for a few minutes, just to melt cheese on top.


I love all kinds of toppings, but this time I used pizza sauce, baby spinach, baby Bella mushrooms, black olives, and pesto.  I also topped it off with a little parmesan & mozzarella, which I usually try to avoid since the crust is full of cheese.


Go ahead and try whatever you like.  And let me know if you come up with an amazing combination, I'd love to try it out!  This recipe is also not vegan, of course, so if you have an awesome gluten and dairy free option, please share that with us as well!!


1.15.2014

recipe // savory chicken legs


A lot of times Brian and I get home from work and don't feel like spending the whole night in the kitchen...we love cooking, but we like to save those times for days off.  So when this happens, we gravitate towards quick and easy recipes.  I made it my mission to come up with a handful of these recipes to keep us from reaching for the take out menus...if you know what I mean.  We love to eat healthy and this makes it a lot easier.

I thought I'd share one of our favorites.  :)

SAVORY CHICKEN LEGS


Ingredients:

Chicken Drumsticks (Skinless or Skin On...just preference)
Extra Virgin Olive Oil
 You Fav Seasoning Mix (We love Archer Farms Savory Herb from Target - Sea Salt, Spices & Herbs including [Rosemary, Basil, Lavender] Dehydrated Onion, Natural Flavor)


What To Do:
Mix about a 1 tablespoon of seasoning with 2 tablespoons of oil 
(covers about 5 legs, use more if you have more legs...it's not an exact science, & you can't really mess it up. I usually just eyeball it).


Rub oil/seasoning mixture over legs and place on lightly oiled broiling pan. You can also use a shallow baking dish, but we find that the legs crisp up better when they're raised and the heat can circulate around the legs.  Feel free to sprinkle more seasoning on top if you think necessary.


 Bake at 375°F for 50-55 minutes, turning once halfway through.  When done, remove from oven and let cool for 5 minutes.  Then, enjoy!


Simple, right?!  

Honestly, the hardest part is waiting until they are done... becasue they are so dang delicious!  

I usually make a veggie and side while we are waiting...we love garlicky green beans and sweet potato fries (maybe some other recipe posts, perhaps..).


1.28.2013

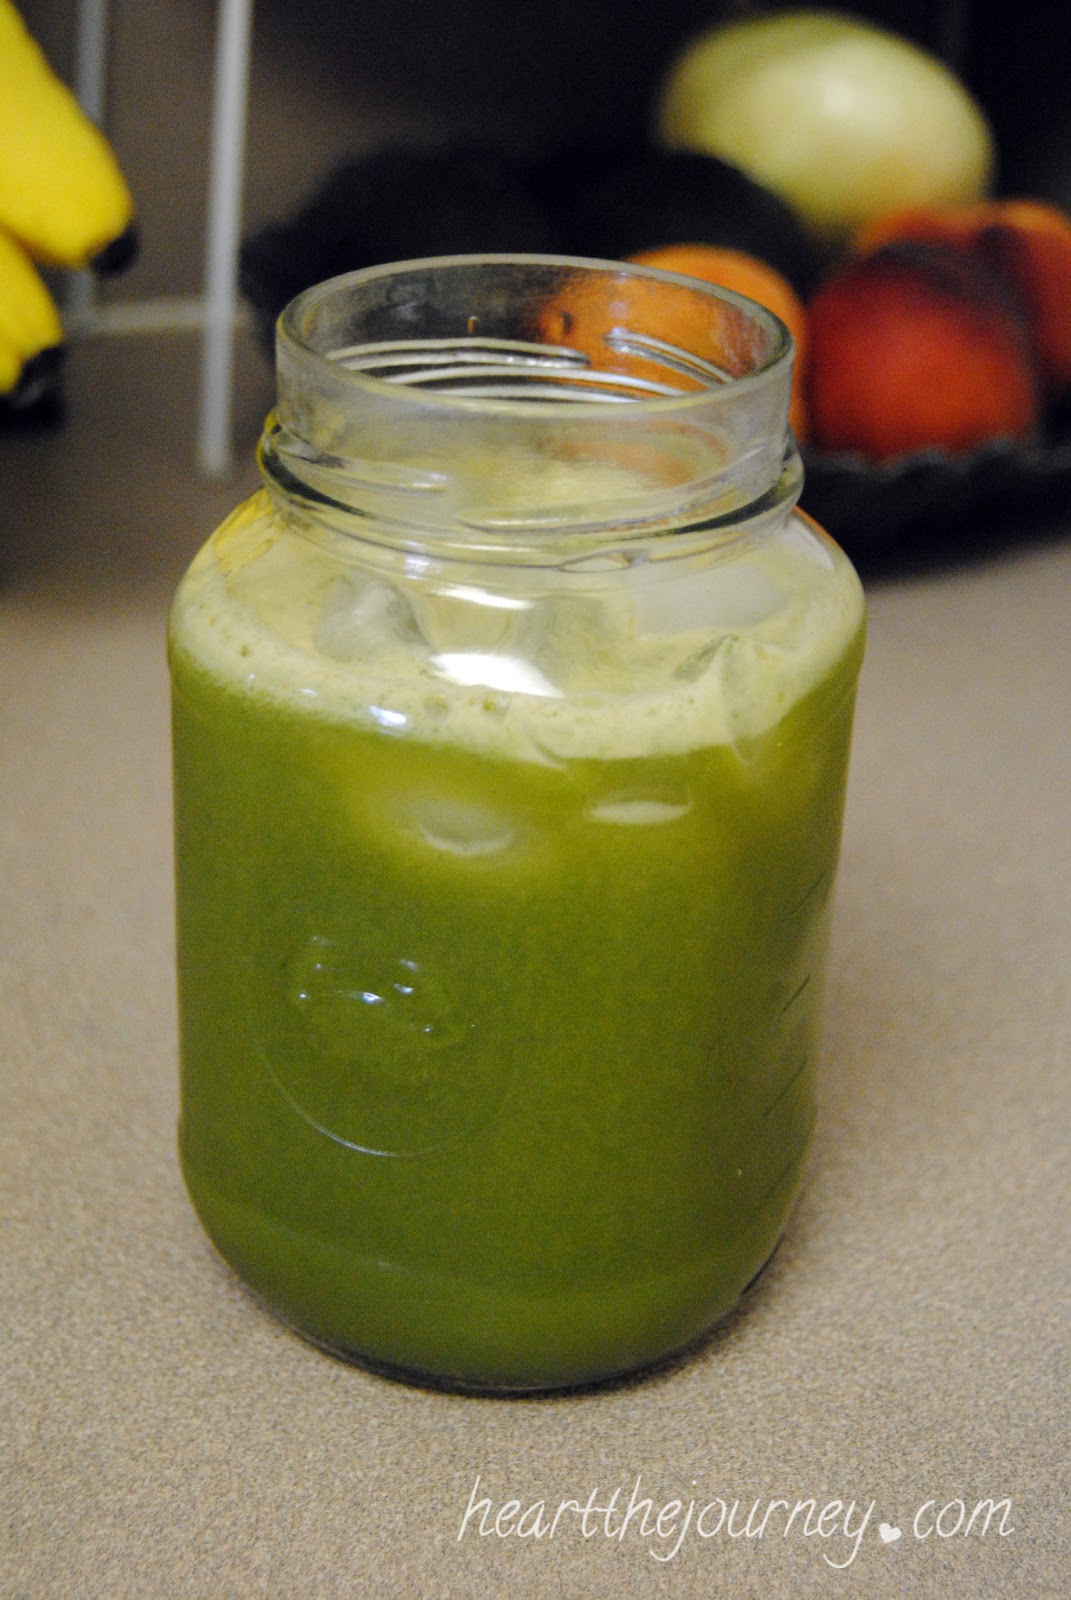
recipe // GREEN Juice


Brian and I started juicing about a year ago after we saw Fat, Sick and Nearly Dead on Netflix.  We have always tried to be healthy and eat a variety of fruits and vegetables (F&V), but honestly, and unfortunately, it's hard to eat the recommended amount - 6 to 13 servings - each day.  By juicing, you can fit way more F&V into your diet (even the ones you may not particularly care for like the green leafy kind). Plus it creates a concentrated source of valuable nutrients that can be easier for your body to absorb.  

We purchased a Jack LaLanne Stainless Steel Power Juicer Pro, which has worked really well for us.  But I've heard Breville and Kuvings are good brands too. Although we stopped for a few months (laziness), we are back to it again, since the new year.  

 Brian and I like to supplement our daily meals by adding a juice with lunch, or as a snack during the day... and we probably juice once a week or so.  I'd like to up that to 2 or 3 times a week over the next couple months.  I just need to get on a routine of buying enough fresh F&V for the whole week.  Oh, I also want to add, we still eat whole fruits and vegetables too...gotta get that natural fiber!

Anyhow, I made a delicious juice this afternoon, and thought I'd share.  Maybe it'll inspire some of you who've been thinking about juicing, to actually do it!


This green juice helps boost immunity, digestion, and cellular health.  

Don't be scared by the kale...I promise you won't even taste it!!

What you'll need (makes one 16oz serving):

4 hand-fulls of kale
1/2 medium cucumber
1 medium carrot
1 green apple
1 pear


Put all ingredients through the juicer, then pour over ice.  


Make sure to enjoy your juice immediately, since the nutrients and enzymes begin to break down relatively quickly when exposed to light and air.

And remember, there's no limit, the mix of fresh fruits and veggies is endless!  

Do you have any favorite juicing recipes??


1.24.2013

recipe // Easy Fudgy PB & Chocolate No-Bake Cookies


  The No-Bake has always been a dessert/snack fav for Brian and I, and over the years I've made many small manipulations to make it just how we like it...dark and fudgy.  Don't get me wrong, the original is good, but, in my opinion, this version really amps up the delicious factor.  

Every time I share with friends and family I get asked for my recipe, so I decided to go ahead and share for everyone to try.  Oh, and just a warning...you may be tempted to eat the whole batch before they're even cool...so watch out! :)

What you will need:

1/2 cup milk
3 Tbsp. butter  UPDATE: We use organic unrefined coconut oil in place of butter now (3Tbsp.)
1/2 cup raw turbinado sugar
4 Tbsp. special dark cocoa powder (you can use regular if you prefer)
1 tsp. vanilla extract
1/2 cup creamy peanut butter (we like Skippy Natural)
1 1/2 cup quick-cooking oats

What to do:


In a medium saucepan, combine sugar, milk, butter, and cocoa. 


Bring to a boil over medium-high heat, stirring consistently and cook for exactly 1 1/2 minutes. The timing is really important here... If you boil too long the cookies will be dry and crumbly. If you don't boil long enough, the cookies won't form properly. I suggest setting a timer for the exact 1:30.


 Remove from heat when the time is up, and stir in peanut butter and vanilla.


When the cocoa mixture and the PB are completely combined, add the oats, 1/4 cup at a time.  We like a fudgier consistency, so I usually stop at 1 1/2 cups, but if you like a firmer cookie, feel free to add another quarter cup of oats. 


Drop by teaspoonfuls onto wax paper and let cool until hardened... if you can wait that long!

If you have any leftovers, these babies will last 3-5 days stored in an airtight container in the fridge.


Enjoy!