2.21.2013

A Multitude of Uses for Essential Oils


I would have posted this a few days ago, but I've been a little batty this past week with wedding timelines and pretty reception inspirations floating around and colliding in my head... So here I am... sharing it now.  :)


Last week I received a lovely little package in the mail.  An essential oils sampler from Eden's Garden.  Yay!  Not as excited as me?  Well, you should be... Essential oils can be used for soooo much!  I purchase Lavender and Vanilla from EG last year, and decided it was time to branch out with some other oils I've been reading about lately. This sampler set includes: Eucalyptus, Lavender, Lemongrass, Orange, Peppermint, Tea Tree. And at less than $20 on sale, a great way to try them out!


Here are just some of the uses for essential oils:


Personal/Body Care Uses 

Body Oils  //  Mix 1 cup carrier oil with 30-60 drops essential oil. Use as a moisturizer after a shower or add to a bath.  
Body Butter  //  Make your own body butter and scent it using your favorite essential oils. I love Lavender and vanilla for this idea. 
Sugar Scrub  //  To make a basic scrub, mix 1 cup sugar with 1/2 cup carrier oil (Sweet Almond Oil, Grapeseed Oil, Olive Oil, etc.) and add 4-6 drops of the essential oil of your choice. Try this yummy Brown Sugar Vanilla recipe. 
Salt Scrub  //  Same concept as a sugar scrub, except using salt. Using eucalyptus or peppermint would be nice for tried, achy feet! 
Mouthwash  //  Again, another DIY I want to try, using peppermint essential oil. 
Blemish Remover  //  Put a drop of Tea Tree oil on a blemish and watch it disappear.   
Deodorant  //  This is one of my next DIYs to try, using tea tree and lavender essential oils. Update to come! 
Toothpaste  //  You can make your own toothpaste using coconut oil, baking soda, and peppermint essential oil. I am in the process of testing this recipe out and will post on it in a few weeks, so make sure you check back!


Home Remedies 

Sunburn  //  Fill a 4 oz. glass spray bottle with distilled water and add 10 drops lavender essential oil. Spray on burnt area to relieve pain and promote healing. 
Headaches  //  Apply 1-2 drops of peppermint essential oil to temples, forehead, and back of neck. Dilute with a carrier oil for sensitive skin. 
DIY Vapo-Rub  //  To make your own Vapo-Rub, just add an essential oil such as eucalyptus to a carrier oil and rub on chest, back and the bottoms of feet to relieve congestion and coughing. 
First Aid for Cuts and Scrapes  //  Combine Lavender or Tea Tree oil with a carrier oil and apply to cuts and scrapes. 
Cold Sores and Canker Sores  //  Dilute Tea Tree essential oil and apply 1-2 drops directly to the cold sore.


Household Uses 

Cleaning/Disinfecting  //  Add several drops of your favorite essential oil to 1 part water and 1 part white vinegar for an all purpose cleaner. Lemon would be good. 
Floor Cleaner  //  Try a fresh citrus floor cleaner, using only water, castile soap, and lemon and orange essential oils. 
Linen Spray/Room Spray  //  Fill a small glass spray bottle with distilled water and add essential oil until the mixture reaches the potency desired. 
Air Freshener  //  Fill a jar about 1/2 full of baking soda along with 10-15 drops of your favorite essential oil. Using a hammer and nail, poke holes in the lid and place somewhere your air needs freshening.  
Laundry  //  If you make your own laundry detergent, you can add essential oil to scent it or you can add 3-5 drops of essential oil to your detergent before each load. I have also been using a cloth sprayed with vinegar and several drops of Eucalyptus in the dryer to replace dryer sheets! 
Clean your mattress  //  Add several drops of essential oil (maybe Lavender) to a cup of baking soda and sprinkle over mattress. Leave for an hour and then vacuum up.  
Goo-Gone  //  Use several drops of lemon essential oil or other citrus based oil to remove sticker gunk, such as when you want to get a label off of a jar. 

 Just Remember...

 Essential oils can be used aromatically, topically, or taken internally. However, especially for topical and internal use, it’s important to make sure you are using high quality, 100% pure essential oils. Many of the essential oils on the market are produced solely for their aromatic quality and so are not of high enough quality to be used on your skin or in your body.

Always make sure you do your research before using essential oils as some are not recommended in certain circumstances (such as while pregnant).

Essential oils can be very powerful, so a little goes a long way. Most uses require only a few drops of essential oil. If you store essential oils in a cool, dark place, they will keep for years.


Also, check out Crunchy Betty’s 21 Things You Should Know About Essential Oils for further information...so interesting!


I very excited to try out some of the uses above with the oils I just received...I'll let you know how it goes!! 


2.15.2013

Sadie, Sadie...


...Married Lady....  to be!!

That's right, folks...Brian and I are ENGAGED!  Ahhhhhh!

Anyone that knows us, knowing that we've been dating for almost 6 years, has been expecting this.  And, we've talked about it off and on for quite some time, but I did not expect it yesterday... especially during a rainy golf outing! Plus, it was Valentine's Day, which is so not his style, but his grandparent's wedding anniversary is Feb 14th (they just celebrated 71 years!) and he thought it'd be a nice tribute to them. It really was the best surprise and I wouldn't have had it any other way.

Here's the story...


Brian has to request his time off for the year, the October before (horribly inconvenient, I know). Anyhow, among the days he randomly requested off for 2013 was Valentine's Day. I decided to take off as well, so we could go golfing together.  It's one of our most favorite things to do as a couple. So fun!  

Well, on Wednesday, we saw the weather report.  80% rain...not really the best conditions for golf.  This didn't change the next morning, but it seemed like it might let up, so off we went to Diamond Hill (very appropriate, don't you think).  For some reason, I wasn't my usually "I don't want to get wet, that sounds muddy and gross" self, and I really thought it would be fun. I should note, it wasn't pouring..just an off and on drizzle. 


We loaded up the cart, I donned Brian's Coast guard jacket (which was more like a waterproof dress) and off we went!

We played through Holes 1-4 pretty much like normal, although we took turns holding the umbrella over the clubs and cart to deflect the sprinkles. I should also mention that I haven't played in a couple months, but was doing surprisingly well in the wetness.. so it really was fun.


We approached hole 5 (where the restroom is), and anyone who knows me, knows I will never pass up the chance to "go". So we teed off and off I went, while Brian made his way up to the green.


When I came back I pitched my ball up to the green and proceeded to putt it in.  Brian was up by the hole holding the flag. My ball made it 3 feet from the hole, so I hit it again and it went in. After a small jump up and down (yes, I'm that guy..and darn proud of it), I went to reach in the hole for my ball, but saw this!

 I looked up at Brian, with my mouth wide open, just as he was getting down on one knee. I believe my words were, "What!? Now? Right now!?"  lol..funny, I know.


Well, he asked if I would and, of course, I said yes! **Kiss, kiss, hug hug**
 

Isn't it pretty?? #cantstoplookingatit #mesmerized


I think this very official picture really captures the foggy, rainy state of the day...even though it was blue skies and rainbows in my eyes!


We played through Hole 9, then left to get some lunch at Jimmy John's. In my opinion, a perfect finish!

:)


2.13.2013

Day at the Fair...etc.


Brian and I spent a few hours, yesterday, at the State Fair & Cracker Country (my fav!).  I thought I'd share some pictures...sorry there are none of the food...we were too busy eating it.  ;)


 I wanted to take these piglets home!


Later, we took the pups to a local dog park where Lexi ran around with the biggest dog there [at warp speed] for an hour straight (I don't know where she gets all that energy, but if I could bottle and sell it, I'd be a rich lady). Phoenix tried to join, but eventually gave up and decided exploring every inch of the park was more to his liking. We ended the day with homemade chicken wings & coleslaw (YUM) and Trading Places on the tube.

I ❤ family time.


2.09.2013

Artsy Fartsy // Sketch #1


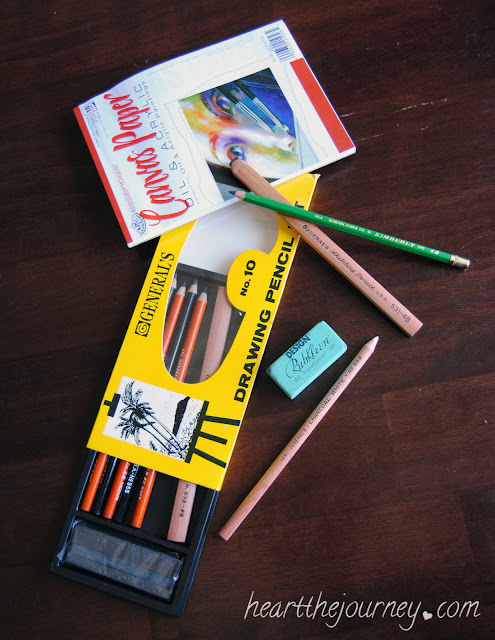
Anyone remember these gems I picked up at Jo-Ann Fabrics?

Well, I finally sat down the other day and put them to good use!  Okay, so maybe not good use, but use nonetheless...

I've done a handful of fine art projects over the past few years...sketching and acrylic paintings...but my skills are, honestly, quite a bit rusty.  My hope is to use these tiny artist pads to work on my skills and mainly to just be creative.  Because creating, especially through fine art, makes me happy in a way that other things don't.  (I think you crafty, artsy people out there know what I'm talking about...

The morale of this story is that I want to hold myself accountable to produce at least one artsy "lovely" (as my wonderful friend, Sara, deemed it) a month (if not more!).  And I will showcase them right here on my blog in a new feature I'm going to respectively call "Artsy, Fartsy".  

Hopefully, by doing this feature, it will effortlessly become a part of world again. 

So here's a look-see at my first sketch (I used 4B graphite and white charcoal pencils), that was inspired by Lexi's irresistible face, under bite and all!  I hope, like me, it makes you smile.


2.07.2013

The Oil Cleansing Method


dun, dun, dun.....

Ever since I did a post on 10 Synthetic Cosmetic Ingredients to Avoid, where I talk about my all-natural skincare regime (including the Oil Cleansing Method), I've received a lot of questions about what the OCM really is and how to do it.

Well, never fear my friends! I've decided to do a detailed post to explain, at least the way that I do it, so that any of you who are interested in giving it a try will have something to follow, or start with. So, here it is!

pic source

Let me start by mentioning that I've been faithfully using the OCM every night for almost a year now.  And, I LOVE IT.  I honestly don't remember where I first heard about the OCM (maybe Pinterest??), but I do remember that I 'Googled' the heck out of it before I started.  

(Side note:  What the heck did we do before 'Googling' was a thing??)

I've mentioned most of this in this post, but to summarize, I gave the OCM a try because of the on-going skin issues I had since the age of 18. I just couldn't seem to find anything in the drug stores or at the dermatologist that helped.  Then, about a year and a half ago, when I found out that my problems (red, itchy, acne-prone skin) could be caused by all of the synthetic chemicals put into the majority of mainstream products, I vowed to try and cut them out of my regime (and my life!). That left me looking for more natural cleansing products, of which I tried a few, but eventually led me to the Oil Cleansing Method. An ALL-natural alternative.

I know what you're thinking right now... "But Katie, it's oil.  Isn't it bad to put oil on your face? I mean, won't it cause breakouts and stuff!?"  It does seem counter-intuitive and goes against what we've always thought, but it's actually good for you... for real! Better than I could explain it, here are two excerpts that I think are a good intro to the OCM.

The basic concept of this skin care and cleansing method is that the oil used to massage your skin will dissolve the oil that has hardened with impurities and found itself stuck in your pores. The steam will open your pores, allowing the oil to be easily removed. Should you need it, the smallest drop of the same oil formula patted over damp skin will provide the necessary lubrication to keep your skin from over-compensating in oil production. //source//

and this...

Do not be afraid of applying oil to your face. Oil, alone, will not bring you blemishes. Pimples, cysts, zits, blackheads, whiteheads…these are a result of several different factors including hormones, bacteria, dead skin cells and the buildup of these factors. Your skin naturally produces oil because it needs it. It is not a malicious force to be reckoned with; it is there for the benefit of your skin, allowing your largest organ to function properly. It is naturally occurring. Not only does your natural oil help lubricate, it also heals, protects, and moisturizes your skin so that it may function properly. Properly functioning skin is beautiful, clear, and glowing. Learning to work with your skin, not against it, will save you tremendously. //source//

So let's jump in, shall we?


Supplies:

The only things you really need to get started are your cleansing oil mixture and two clean dry washcloths. I bought a couple packs of these from Target, so I can use fresh ones frequently

Your cleansing oil is a mixture of Castor Oil and a moisturizing carrier oil (like Olive Oil).  You can even add certain essential oils to the mix, like tea tree, if you are acne-prone.  However, I'd suggest starting with just the two oils until your skin (and you) get used to the method.

Here are some suggestions in creating your blend of cleansing oil:
  • Oily Skin:  30% Castor Oil to 70% carrier oil.
  • Balanced Skin:  20% Castor Oil to 80% carrier oil.
  • Dry Skin: 10% Castor Oil to 90% carrier oil.
I have dry skin, so I found that the 1:9 ratio works best for meI also like to use Organic Olive Oil as my carrier oil.  If you're unsure what to try, Crunchy Betty has a good resource about Carrier Oils for different skin types, check it out hereNow remember, these formulas are meant as a guide. You will most likely need to make a few adjustments until you reach your perfect recipe.


 I like to use a dark glass bottle with dropper for my oil mix (It allows for cleaner dispensing, but you can use any clean jar or bottle.  You can find bottles like mine at health food stores, like Whole Foods, or onlineTo make it easier, I use a 1/2 tsp to measure out my oils...so for me [1]1/2 tsp Castor & [9]1/2 tsps Olive.  That way there's no figuring out exact measurements, its just spoonfuls. 

Okay, ready to get started?


The Method:

  1. Start With a Dry Face.  Pour a quarter-sized amount of your oil mixture into your palm and rub together to warm up.
  2. Massage Your Face.  Gently apply the oil to your face in a circular motion. Massage it into your skin, but don’t scrub.   Continue to massage the oil into your skin for 30-60 seconds.  Concentrate on areas with blocked pores.
  3. Steam Your Pores. Turn on the tap to very hot water (as hot as you can stand, but NOT scalding). Saturate one of your washcloths, wring it out, then lay it across your face to steam your pores open. Leave it on until it cools back down to room temperature..about a minute.
  4. Massage Again.  While it's still on your face, gently massage through the washcloth for another 5-10 seconds to work out any impurities from your pores.
  5. Steam Again.  Rinse the wash cloth, wring it out, and lay it on your face a second time.
  6. Clean Your Face. Once it cools down, rinse it again, then gently wipe your face clean, removing all the dirt and impurities from your skin and pores. Finally, splash your face with cool water to close pores. Use the second, dry washcloth to gently pat dry.
  7. Moisturize. (0ptional) There should be a thin layer of oil still on your skin to balance and protect.  But if skin feels a little tight after (as mine usually does since it's super dry), feel free to moisturize with a tiny bit of your carrier oil (I prefer to use a separate bottle of Jojoba Oil to moisturize, and I pat 4-5 drops all over my face.  A tiny bit of Coconut Oil would be a great option too.)


Just a few Notes:
  • It’s best to do this at night, before going to bed. Some people do it every night (like me), some do it every other night, and some do it just a few times a week.  Go with whatever feels natural and necessary for you.  In the morning, I cleanse with Raw Honey, and I use a lemon honey mask/scrub about once a week (more on that later!).  The one thing I would probably steer clear of is switching up the OCM with a store-bought facial cleanser that contains sulfates or sulfides. You’ll just confuse your skin and it won’t know what to do with its own oil. 
  • Don’t be alarmed if for the first few days, your skin looks like it’s getting worse – that’s normal! It just means that the oils are working and are cleansing your pores by bringing all the lingering dirt and impurities to the surface.  Your oil production will balance out and the breakouts will get better!
  • When you are ready to replenish your oil blend, I recommend thoroughly cleaning your bottle with dish soap or popping it in the dishwasher.  Then make sure to completely dry it before pouring in the new oil, so that bacteria isn't introduced to the bottle.
  • And last but not least, remember that the Oil Cleansing Method is not a cure-all.  The best way to combat skin troubles is through diet, i.e. drink plenty of water and steer clear of processed and chemical-rich foods.  If you do these things and add in the OCM, and you'll be on your way to better looking skin, hair and nails in no time!

So that's it!  I really love how soft and clear my skin has been using this method and the best parts are that it's 100% natural and super CHEAP!


My Challenge: 

TRY IT. For 2 weeks. If your skin isn’t clearer, softer, and overall happier, go back to whatever skincare regime you’ve been using. No Loss... but, I bet you’ll fall in love. 


Please feel free to comment or send me an email with any questions.  And if you've tried or are using the OCM, I'd also love to hear your thoughts and experiences!


2.04.2013

Fabulous Finds // Retro Pyrex Mixing Bowls


I really love a good find.... something about the thrill of the hunt (and all that jazz).

Most of the time, I can't just buy a random tchotchke from Target. I like things with a story and they have to speak to me... or at least be a trillion percent off and I'd be a fool not to find a home for it.  :)

Either way, I've decided to document and share these finds in a post series, called "Fabulous Finds". I hope you enjoy them as much as I do.


So yesterday, I had the pleasure of doing a little antiquing with my lovely friend, Courtney.  I don't often get the chance to do so, so it was definitely a treat.

I got lucky and went home with a few gems, one of which was this awesome set of Autumn Harvest Mixing Bowls from Pyrex.  I really was in need of a set like this, since I do cook a lot (plus I think these would be excellent to mix up a batch of my homemade body scrub).  


  I did a little research, and found that this set came out in the late seventies, early eighties and is fairly popular.  They are a little roughed up, but honestly, I think that gives them character, and it doesn't effect their functionality one bit. 

I love that there are three sizes; 1.5 pint, 1.5 quart & 2.5 quart... perfect for all of my mixing needs.  I also love that these babies can go in the micro and the oven.  

Versatile?  Absolutely.

I also love the retro orange wheat pattern, but the best part is that I got the whole set for around $25.  Win, win!

Thanks, Courtney, for helping me pick them out!!  I can't wait to start mixin' up all sorts of good stuff!  

Carrot cake anyone??