Showing posts with label health. Show all posts

4.19.2015

recipe // Tuscan Quinoa Salad


I've been making a variation of this salad for several years but this is my favorite way to make (and eat) it.

It's super quick to whip up and, even better, it's so, so good for you!  Plus it's Tone It Up approved!!

Kale is a leafy green cruciferous vegetable that is chock-full of essential vitamins A, C and K as well as minerals like copper, potassium, iron, manganese and phosphorus. A cup of fresh kale has only about 40 calories but packs almost 3 grams of protein. One cup of cooked kale has over 1000% more vitamin C than a cup of cooked spinach and unlike spinach, kale's oxalate content is very low which means that the calcium and iron in kale are highly absorbable in the human digestive system.
The high monounsaturated fat content of olives has been associated with reduced risk of cardiovascular disease. Diets rich in monounsaturated fat have been proven to decrease blood cholesterol, LDL cholesterol, and LDL:HDL ratio. Recent research studies have also shown that the monounsaturated fat found in olives (and olive oil) can help to decrease blood pressure. In terms of their phytonutrient content, olives are nothing short of astounding. Few high-fat foods offer such a diverse range of antioxidant and anti-inflammatory nutrients—some of which are unique to olives themselves. This may also make them a powerhouse of protection against cancer because chronic oxidative stress and chronic inflammation can be key factors in the development of cancer.

Avocado is another great source of monounsaturated fat, antioxidant and anti-inflammatory nutrients; all of which aid in proper body functions. This
monounsaturated fat and the avocado's high fiber content makes it great for weight loss. Research has shown that monounsaturated fatty acids are more likely to be used as slow burning energy than stored as body fat. Plus, one cup of avocado provides about 7-8 grams of dietary fiber, making it excellent at regulating blood sugar. This slow burning energy and the feeling of satiety or satisfied fullness that you get from eating an avocado is one of the reasons they are known for reducing hunger and appetite. Avocado is also great for nourishing and increasing cellular turnover in skin.

Tomatoes are a rich source of vitamins A and C and folic acid. They contain a wide array of beneficial nutrients and antioxidants, including alpha-lipoic acid, lycopene, choline, folic acid, beta-carotene and lutein, which may lower your risk for developing cancer, high blood pressure, heart attack, diabetes, depression... even wrinkles and constipation.

Kidney beans (includes Cannellini) are a very good source of cholesterol-lowering fiber, as are most other beans. In addition to lowering cholesterol, kidney beans' high fiber content prevents blood sugar levels from rising too rapidly after a meal, making these beans an especially good choice for individuals with diabetes, insulin resistance or hypoglycemia.  When combined with whole grains such as rice, kidney beans provide virtually fat-free high quality protein. Kidney beans are also an excellent source of molybdenum, folate, manganese, phosphorus, protein, vitamin B1, iron, potassium, magnesium, fatty acids, and amino acids. All of these key nutrients contribute to good overall heart health.

Quinoa is naturally gluten-free and contains iron, B-vitamins, magnesium, zinc, phosphorus, potassium, calcium, vitamin E and fiber. It is one of only a few plant foods that are considered a complete protein and comprised of all pernine essential amino acids. Botanically, quinoa is actually not classified as a grain. It is a pseudo-cereal (a non-grassy plant used in much the same way as cereals and grains with a similar nutritional profile). The seeds of pseudo-cereals can be milled and ground into flour just as other grains and cereals. It provides a variety of antioxidant phytonutrients, antioxidant flavonoids, and anti-inflammatory polysaccharides. The antioxidant and anti-inflammatory phytonutrients in quinoa also make it a likely candidate for cancer risk reduction in humans. Many studies have shown that as whole grain intake increases, the risk for cardiovascular disease, diabetes, High BP, colon cancer & obesity decreases.

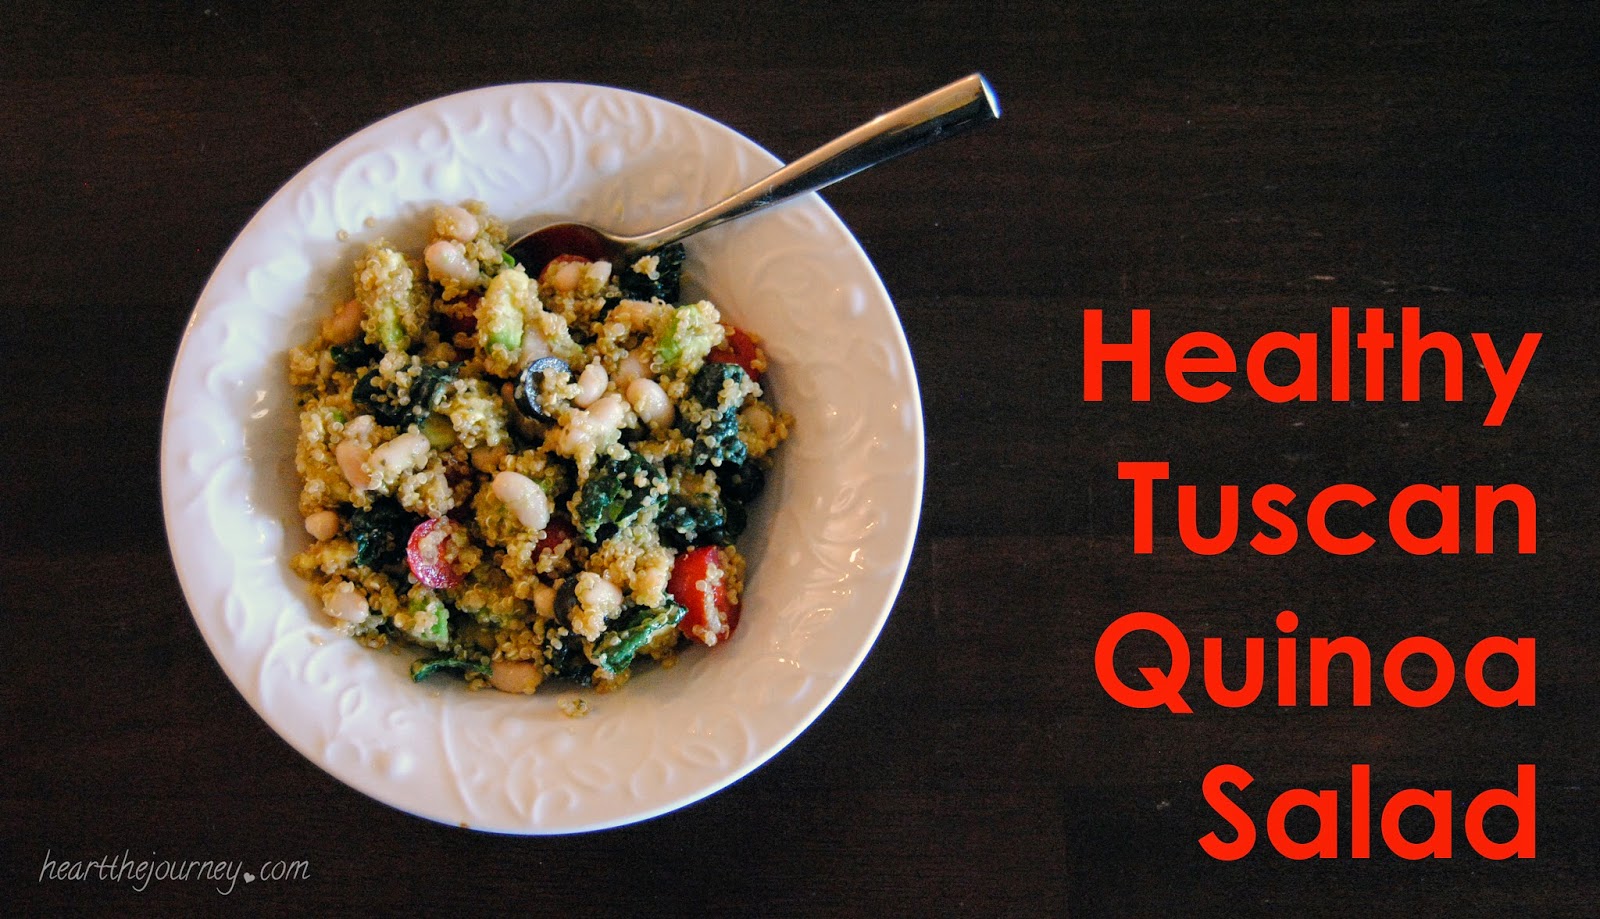
So now that you know a little bit more about the amazing ingredients in this salad, let's get to the recipe!

______________________________

WHAT TO GET


SALAD:

1 cup uncooked quinoa (any variety)
1 1/2 cups water or broth
Pinch of Sea Salt
1/8 t Cumin
1/8 t Smoked Paprika
1/8 t Garlic Powder

1 large Avocado - diced
3/4 cup Cherry Tomatoes - halved
1/2 cup Black Olives - sliced
3/4 cup Tuscan Kale leaves (I found mine at Trader Joe's) - ripped into bite sized pieces
1 can Cannellini Beans - rinsed & drained

DRESSING: 
Juice of half a lemon
1/4 cup Olive Oil
1/4 t Sea Salt 
1/4 t Pepper
Sprinkle of Cilantro
  

WHAT TO DO

1  //  Cook quinoa via package instructions. I mix quinoa, broth, sea salt, cumin, garlic powder & paprika in saucepan, bring to a boil then lower to a simmer for 15 minutes.

2  //  While quinoa is cooking, prepare remaining salad ingredients and add to a mixing bowl.  


3  //  When quinoa is done, remove from stove and put into a bowl to cool.

4  //  While quinoa is cooling, prepare dressing.  Combine all dressing ingredients in a separate bowl and whisk to combine.


5  //  In a large bowl or container, add quinoa, dressing and other salad ingredients all together and GENTLY fold to combine.

6  //  Enjoy!


I'm not sure how many servings this makes (I tend to eat it right away out the bowl and then it's hard to tell), but I know it will yield quite a few 1 cup servings... maybe 6?  

This is one of those recipes that is easy to play around with though, you can't really mess it up.  So definitely feel free to subtract anything you don't care for and add anything else you do (like goat cheese, how amazing does that sounds??). 

Let me know if you give this recipe a try and what you think!


3.05.2014

get fit // YouTube: POPSUGAR Fitness


So, I thought it'd be fun to come up with a new feature series about fitness...  A way to share what I've been loving lately to help me "get fit".  


Right now, it's been 10 minute workout videos from POPSUGAR Fitness' YouTube channel.  They're long enough to make me sweat and sore (so sore!) the next day, but short enough to fit in a busy day.  

I especially love them right now, because it's spring pollen season and running outside would probably put me in anaphylactic shock.  Okay, so that might be a bit of a dramatization, but it'd definitely come close.   :\ 

I've included four of my favorites, but seriously, go check them out for yourself, there's so many to choose from!  If you want a longer workout or one to target a specific area or just some healthy eating tips, they've got it.

Victoria's Secret Model Workout: 10-Minute Fat-Blasting Circuit


The Look Good Naked Barre Workout


10-Minute Workout: Legs and Arms With Sadie Lincoln


The Butt-Lifting Workout That's Better Than Spanx


Let me know if you find one you love!  I may just have to add it to my list.  :)


2.21.2013

A Multitude of Uses for Essential Oils


I would have posted this a few days ago, but I've been a little batty this past week with wedding timelines and pretty reception inspirations floating around and colliding in my head... So here I am... sharing it now.  :)


Last week I received a lovely little package in the mail.  An essential oils sampler from Eden's Garden.  Yay!  Not as excited as me?  Well, you should be... Essential oils can be used for soooo much!  I purchase Lavender and Vanilla from EG last year, and decided it was time to branch out with some other oils I've been reading about lately. This sampler set includes: Eucalyptus, Lavender, Lemongrass, Orange, Peppermint, Tea Tree. And at less than $20 on sale, a great way to try them out!


Here are just some of the uses for essential oils:


Personal/Body Care Uses 

Body Oils  //  Mix 1 cup carrier oil with 30-60 drops essential oil. Use as a moisturizer after a shower or add to a bath.  
Body Butter  //  Make your own body butter and scent it using your favorite essential oils. I love Lavender and vanilla for this idea. 
Sugar Scrub  //  To make a basic scrub, mix 1 cup sugar with 1/2 cup carrier oil (Sweet Almond Oil, Grapeseed Oil, Olive Oil, etc.) and add 4-6 drops of the essential oil of your choice. Try this yummy Brown Sugar Vanilla recipe. 
Salt Scrub  //  Same concept as a sugar scrub, except using salt. Using eucalyptus or peppermint would be nice for tried, achy feet! 
Mouthwash  //  Again, another DIY I want to try, using peppermint essential oil. 
Blemish Remover  //  Put a drop of Tea Tree oil on a blemish and watch it disappear.   
Deodorant  //  This is one of my next DIYs to try, using tea tree and lavender essential oils. Update to come! 
Toothpaste  //  You can make your own toothpaste using coconut oil, baking soda, and peppermint essential oil. I am in the process of testing this recipe out and will post on it in a few weeks, so make sure you check back!


Home Remedies 

Sunburn  //  Fill a 4 oz. glass spray bottle with distilled water and add 10 drops lavender essential oil. Spray on burnt area to relieve pain and promote healing. 
Headaches  //  Apply 1-2 drops of peppermint essential oil to temples, forehead, and back of neck. Dilute with a carrier oil for sensitive skin. 
DIY Vapo-Rub  //  To make your own Vapo-Rub, just add an essential oil such as eucalyptus to a carrier oil and rub on chest, back and the bottoms of feet to relieve congestion and coughing. 
First Aid for Cuts and Scrapes  //  Combine Lavender or Tea Tree oil with a carrier oil and apply to cuts and scrapes. 
Cold Sores and Canker Sores  //  Dilute Tea Tree essential oil and apply 1-2 drops directly to the cold sore.


Household Uses 

Cleaning/Disinfecting  //  Add several drops of your favorite essential oil to 1 part water and 1 part white vinegar for an all purpose cleaner. Lemon would be good. 
Floor Cleaner  //  Try a fresh citrus floor cleaner, using only water, castile soap, and lemon and orange essential oils. 
Linen Spray/Room Spray  //  Fill a small glass spray bottle with distilled water and add essential oil until the mixture reaches the potency desired. 
Air Freshener  //  Fill a jar about 1/2 full of baking soda along with 10-15 drops of your favorite essential oil. Using a hammer and nail, poke holes in the lid and place somewhere your air needs freshening.  
Laundry  //  If you make your own laundry detergent, you can add essential oil to scent it or you can add 3-5 drops of essential oil to your detergent before each load. I have also been using a cloth sprayed with vinegar and several drops of Eucalyptus in the dryer to replace dryer sheets! 
Clean your mattress  //  Add several drops of essential oil (maybe Lavender) to a cup of baking soda and sprinkle over mattress. Leave for an hour and then vacuum up.  
Goo-Gone  //  Use several drops of lemon essential oil or other citrus based oil to remove sticker gunk, such as when you want to get a label off of a jar. 

 Just Remember...

 Essential oils can be used aromatically, topically, or taken internally. However, especially for topical and internal use, it’s important to make sure you are using high quality, 100% pure essential oils. Many of the essential oils on the market are produced solely for their aromatic quality and so are not of high enough quality to be used on your skin or in your body.

Always make sure you do your research before using essential oils as some are not recommended in certain circumstances (such as while pregnant).

Essential oils can be very powerful, so a little goes a long way. Most uses require only a few drops of essential oil. If you store essential oils in a cool, dark place, they will keep for years.


Also, check out Crunchy Betty’s 21 Things You Should Know About Essential Oils for further information...so interesting!


I very excited to try out some of the uses above with the oils I just received...I'll let you know how it goes!! 


2.07.2013

The Oil Cleansing Method


dun, dun, dun.....

Ever since I did a post on 10 Synthetic Cosmetic Ingredients to Avoid, where I talk about my all-natural skincare regime (including the Oil Cleansing Method), I've received a lot of questions about what the OCM really is and how to do it.

Well, never fear my friends! I've decided to do a detailed post to explain, at least the way that I do it, so that any of you who are interested in giving it a try will have something to follow, or start with. So, here it is!

pic source

Let me start by mentioning that I've been faithfully using the OCM every night for almost a year now.  And, I LOVE IT.  I honestly don't remember where I first heard about the OCM (maybe Pinterest??), but I do remember that I 'Googled' the heck out of it before I started.  

(Side note:  What the heck did we do before 'Googling' was a thing??)

I've mentioned most of this in this post, but to summarize, I gave the OCM a try because of the on-going skin issues I had since the age of 18. I just couldn't seem to find anything in the drug stores or at the dermatologist that helped.  Then, about a year and a half ago, when I found out that my problems (red, itchy, acne-prone skin) could be caused by all of the synthetic chemicals put into the majority of mainstream products, I vowed to try and cut them out of my regime (and my life!). That left me looking for more natural cleansing products, of which I tried a few, but eventually led me to the Oil Cleansing Method. An ALL-natural alternative.

I know what you're thinking right now... "But Katie, it's oil.  Isn't it bad to put oil on your face? I mean, won't it cause breakouts and stuff!?"  It does seem counter-intuitive and goes against what we've always thought, but it's actually good for you... for real! Better than I could explain it, here are two excerpts that I think are a good intro to the OCM.

The basic concept of this skin care and cleansing method is that the oil used to massage your skin will dissolve the oil that has hardened with impurities and found itself stuck in your pores. The steam will open your pores, allowing the oil to be easily removed. Should you need it, the smallest drop of the same oil formula patted over damp skin will provide the necessary lubrication to keep your skin from over-compensating in oil production. //source//

and this...

Do not be afraid of applying oil to your face. Oil, alone, will not bring you blemishes. Pimples, cysts, zits, blackheads, whiteheads…these are a result of several different factors including hormones, bacteria, dead skin cells and the buildup of these factors. Your skin naturally produces oil because it needs it. It is not a malicious force to be reckoned with; it is there for the benefit of your skin, allowing your largest organ to function properly. It is naturally occurring. Not only does your natural oil help lubricate, it also heals, protects, and moisturizes your skin so that it may function properly. Properly functioning skin is beautiful, clear, and glowing. Learning to work with your skin, not against it, will save you tremendously. //source//

So let's jump in, shall we?


Supplies:

The only things you really need to get started are your cleansing oil mixture and two clean dry washcloths. I bought a couple packs of these from Target, so I can use fresh ones frequently

Your cleansing oil is a mixture of Castor Oil and a moisturizing carrier oil (like Olive Oil).  You can even add certain essential oils to the mix, like tea tree, if you are acne-prone.  However, I'd suggest starting with just the two oils until your skin (and you) get used to the method.

Here are some suggestions in creating your blend of cleansing oil:
  • Oily Skin:  30% Castor Oil to 70% carrier oil.
  • Balanced Skin:  20% Castor Oil to 80% carrier oil.
  • Dry Skin: 10% Castor Oil to 90% carrier oil.
I have dry skin, so I found that the 1:9 ratio works best for meI also like to use Organic Olive Oil as my carrier oil.  If you're unsure what to try, Crunchy Betty has a good resource about Carrier Oils for different skin types, check it out hereNow remember, these formulas are meant as a guide. You will most likely need to make a few adjustments until you reach your perfect recipe.


 I like to use a dark glass bottle with dropper for my oil mix (It allows for cleaner dispensing, but you can use any clean jar or bottle.  You can find bottles like mine at health food stores, like Whole Foods, or onlineTo make it easier, I use a 1/2 tsp to measure out my oils...so for me [1]1/2 tsp Castor & [9]1/2 tsps Olive.  That way there's no figuring out exact measurements, its just spoonfuls. 

Okay, ready to get started?


The Method:

  1. Start With a Dry Face.  Pour a quarter-sized amount of your oil mixture into your palm and rub together to warm up.
  2. Massage Your Face.  Gently apply the oil to your face in a circular motion. Massage it into your skin, but don’t scrub.   Continue to massage the oil into your skin for 30-60 seconds.  Concentrate on areas with blocked pores.
  3. Steam Your Pores. Turn on the tap to very hot water (as hot as you can stand, but NOT scalding). Saturate one of your washcloths, wring it out, then lay it across your face to steam your pores open. Leave it on until it cools back down to room temperature..about a minute.
  4. Massage Again.  While it's still on your face, gently massage through the washcloth for another 5-10 seconds to work out any impurities from your pores.
  5. Steam Again.  Rinse the wash cloth, wring it out, and lay it on your face a second time.
  6. Clean Your Face. Once it cools down, rinse it again, then gently wipe your face clean, removing all the dirt and impurities from your skin and pores. Finally, splash your face with cool water to close pores. Use the second, dry washcloth to gently pat dry.
  7. Moisturize. (0ptional) There should be a thin layer of oil still on your skin to balance and protect.  But if skin feels a little tight after (as mine usually does since it's super dry), feel free to moisturize with a tiny bit of your carrier oil (I prefer to use a separate bottle of Jojoba Oil to moisturize, and I pat 4-5 drops all over my face.  A tiny bit of Coconut Oil would be a great option too.)


Just a few Notes:
  • It’s best to do this at night, before going to bed. Some people do it every night (like me), some do it every other night, and some do it just a few times a week.  Go with whatever feels natural and necessary for you.  In the morning, I cleanse with Raw Honey, and I use a lemon honey mask/scrub about once a week (more on that later!).  The one thing I would probably steer clear of is switching up the OCM with a store-bought facial cleanser that contains sulfates or sulfides. You’ll just confuse your skin and it won’t know what to do with its own oil. 
  • Don’t be alarmed if for the first few days, your skin looks like it’s getting worse – that’s normal! It just means that the oils are working and are cleansing your pores by bringing all the lingering dirt and impurities to the surface.  Your oil production will balance out and the breakouts will get better!
  • When you are ready to replenish your oil blend, I recommend thoroughly cleaning your bottle with dish soap or popping it in the dishwasher.  Then make sure to completely dry it before pouring in the new oil, so that bacteria isn't introduced to the bottle.
  • And last but not least, remember that the Oil Cleansing Method is not a cure-all.  The best way to combat skin troubles is through diet, i.e. drink plenty of water and steer clear of processed and chemical-rich foods.  If you do these things and add in the OCM, and you'll be on your way to better looking skin, hair and nails in no time!

So that's it!  I really love how soft and clear my skin has been using this method and the best parts are that it's 100% natural and super CHEAP!


My Challenge: 

TRY IT. For 2 weeks. If your skin isn’t clearer, softer, and overall happier, go back to whatever skincare regime you’ve been using. No Loss... but, I bet you’ll fall in love. 


Please feel free to comment or send me an email with any questions.  And if you've tried or are using the OCM, I'd also love to hear your thoughts and experiences!


1.28.2013

recipe // GREEN Juice


Brian and I started juicing about a year ago after we saw Fat, Sick and Nearly Dead on Netflix.  We have always tried to be healthy and eat a variety of fruits and vegetables (F&V), but honestly, and unfortunately, it's hard to eat the recommended amount - 6 to 13 servings - each day.  By juicing, you can fit way more F&V into your diet (even the ones you may not particularly care for like the green leafy kind). Plus it creates a concentrated source of valuable nutrients that can be easier for your body to absorb.  

We purchased a Jack LaLanne Stainless Steel Power Juicer Pro, which has worked really well for us.  But I've heard Breville and Kuvings are good brands too. Although we stopped for a few months (laziness), we are back to it again, since the new year.  

 Brian and I like to supplement our daily meals by adding a juice with lunch, or as a snack during the day... and we probably juice once a week or so.  I'd like to up that to 2 or 3 times a week over the next couple months.  I just need to get on a routine of buying enough fresh F&V for the whole week.  Oh, I also want to add, we still eat whole fruits and vegetables too...gotta get that natural fiber!

Anyhow, I made a delicious juice this afternoon, and thought I'd share.  Maybe it'll inspire some of you who've been thinking about juicing, to actually do it!


This green juice helps boost immunity, digestion, and cellular health.  

Don't be scared by the kale...I promise you won't even taste it!!

What you'll need (makes one 16oz serving):

4 hand-fulls of kale
1/2 medium cucumber
1 medium carrot
1 green apple
1 pear


Put all ingredients through the juicer, then pour over ice.  


Make sure to enjoy your juice immediately, since the nutrients and enzymes begin to break down relatively quickly when exposed to light and air.

And remember, there's no limit, the mix of fresh fruits and veggies is endless!  

Do you have any favorite juicing recipes??


1.27.2013

review // Nature's Beauty(works) Wet Cleansing & Make up Remover Towelettes


In my 10 Synthetic Cosmetic Ingredients to Avoid post, I briefly went through my all-natural morning and night skincare routine.  I also mentioned that I was in the search for a new cleansing towelette after finishing up my Ponds ones.  It took me awhile to find one that was natural and void of any synthetic ingredients, but I finally did!  

I've gone through the whole pack and thought it was time to share... and buy more!


 Nature's Beauty(works) is a brand of Global Beauty Care.  All of the ingredients are derived from natural or organically grown plants, flowers and sugars, so it is free of synthetic preservatives, SLS, fragrances, alcohol and parabens.  Yay!

 There are three types, ones for oily, sensitive and aging skin.  I chose the sensitive towelettes since I have dry, delicate, blemish prone skin.

The ingredients are:  Aqua (Water), Decyl Glucoside**, Organic Chamomile Extract*, Calendula Officinalis Flower Extract*, Organic Aloe Vera Extract*, Lavender Oil*, Vanilla Oil*, Patchouli Oil*, Allantioin*, Gluconolactone***, Sodium Benzoate***, Glycerin*.

*Plant Derived  **Sugar Derived  ***Naturally Derived
 
I was a little concerned when I found out it had chamomile as an ingredient.  For most people, chamomile has properties that sooth and regenerate itchy, flaky and dried out skin.  But since chamomile is part of the Asteraceae plant family, which includes ragweed, people with ragweed allergies may not be so lucky.  

I, unfortunately, suffer from seasonal allergies (that are starting right now..oh Springtime) and that includes oak pollen and (though I've never been formally tested) probably ragweed.  Well, I figured I'd give it a try and if any reaction started to occur I would stop immediately.  Fortunately, I got through the whole pack with no issues... so I say they're a keeper! 


 So how did they fare?

Well, the cloths remove all of my makeup, even mascara (I actually don't have to use my coconut oil eye makeup remover, when I use these wipes). They have a light flowery, herbal scent, that just smells clean.  I LOVE the packaging, with the plastic lid that securely closes, leaving you knowing your wipes won't dry out by the next time you use them.  The clothes themselves are a pretty good size about 5" x 7".  The biggest downside I found was that they were also a bit thin... I would have liked them to be a bit thicker... so I usually use mine folded in half.  Other than that, I really like these face towelettes.

I bought mine at Bed, Bath and Beyond in their Face Values beauty section. I paid $3.99 for 30 towelettes (a bit steep) but with the 20% coupon they mail out, I actually paid just over $3.  The price point is the only other downside for me.  I wish it was less, but I will probably continue to purchase because it's the most natural towelette I've found, and using something without chemicals is important to me.  If your local BB&B doesn't have a Face Values section, you can also buy them online here.  

If any of you give them a try, let me know what you think!  Or if you've found another natural face cleaning towelette that you like, please feel free to share with us.  :)


1.21.2013

The Beauty Benefits of..... Apple Cider Vinegar


from here

Oh, it can be used for much more than just dressing salads, my friends.  This cheap, all-natural kitchen staple can help make you b-e-a-utiful.  It's been used for centuries for a variety of things, but lately I've been using it as a all-natural hair conditioner and facial toner... and I though I'd share!

 Harsh soaps and chemical-laden shampoos strip hair and skin of its natural oils, which leaves you feeling dry all over (this can sometimes cause an overproduction of natural oils to make up for the dryness -- no good!).  Apple Cider Vinegar, with it's ideal acidity level, counteracts that process and actually balances your skin and hair's natural pH levels.  
Now, you need to make sure that you get the good stuff though. Organic Raw Apple Cider Vinegar (ORACV) has the most benefits, due to it's inclusion of 'mother'.  Mother is a dark, cloudy, foam that contains many minerals and trace elements such as potassium, calcium, magnesium, phosphorous, chlorine, sodium, sulfur, copper, iron, silicon and fluorine, all vital for body health.  I know, I know, it doesn't sound very pretty, but the effects of using it will be.  I've been using Tree of Life Raw Organic ACV, but there are many great brands out there.  You can find them at most health food stores and some grocers.


Natural Hair Conditioner Rinse
 
from here
 
  Months ago, I learned that ORACV can be used as a rinse for hair, so I've been using it once or twice a week since then.  It removes product buildup, which clarifies hair and increases body. It also closes the hair cuticle so light reflects off of it...giving way to super shiny locks!  It's like a hair recharger.  

To relive smoother hair days, mix the equal parts ORACV and water together. After shampooing, pour the mixture into your hair.  If you have a spray bottle, that works even better. Massage it into your scalp. Let the apple cider vinegar sit for a few minutes before rinsing fully with water. You can finish with a light conditioning, but there's really no need to use conditioner. The apple cider vinegar will leave hair feeling smooth and soft.


Natural Facial Toner

from here

  About two weeks ago, I started using ORACV as a morning and night toner.  I heard somewhere (unfortunately, I can't remember) that it is good at combating acne and discoloration (both of which I had at the time).  Also, because skin is naturally acidic, ORACV can help restore your skin's natural pH balance, leaving it at an optimum level between oily and dry.  So far it has cleared up my small blemishes in record time (days instead of a week or more) and I feel it has even lightened some of my darker freckles and lessened my ruddiness.  All wins, yippee!
  
To use as a daily toner, mix one part apple cider vinegar with two parts water (I like distilled).  If you have really sensitive skin, you may want to dilute the solution further.  After naturally cleansing morning and night, I squirt a bit of the mixture on a cotton round and smooth all over my face.  This will leave a light layer on the skin, locking in moisture.  Don't worry, the vinegar smell will dissipate after a few minutes.  To finish,  I lightly moisturize with Jojoba oil.

(Always remember to do a skin test first to make sure your skin is not too sensitive -- even with an extra diluted version. Place a small amount on your neck and leave it on for 15 minutes. If you do not see any reaction then you can apply it directly to your face.)

________________________


These are the two ways I use ORACV right now, but below are other interesting uses that I found...some that I can't wait to try!

For Sunburn Relief  //  Add a cup of apple cider vinegar to your bath, and soak for 10 minutes.

As a Natural Aftershave (for the guys)  //  Fill a bottle with equal parts apple cider vinegar and water, and shake before applying to the face. 

To Reduce Allergies and Illness  //  Research suggests that ORACV can help with allergies because of its ability to reduce mucous and sinus congestion. When reducing the effects of allergies, it can also help stave off sinus infections and their related symptoms (sore throats and headaches).  Drink at least 2 tablespoons mixed with 8 oz of water daily.  You can also add a tablespoon of organic honey or stevia if it tastes too bitter for you. **

As a remedy for bad breath  //  Due to its antiseptic properties, it makes a wonderful remedy for bad breath or halitosis. Simply add 2 teaspoons of ORACV into a cup of water and gargle the mixture in your mouth for 10 seconds at a time and spit the solution out. Repeat until the cup is empty.  

To Eliminate Body Odor  //  It can help adjust the skin's pH level which helps to eliminate odor-causing bacteria. For armpit odor, simply wipe them once each morning with undiluted apple cider vinegar (using a cotton ball). For foot odor, fill a pan with warm water and add 1/3 cup of ACV, then let your feet soak in this mixture for 15 minutes once per week.

 To Alleviate Heartburn  //  Mix 2 tablespoons ORACV in 8 oz of water, taken three times a day before meals. **

AND EVEN As Flea Prevention on Pets  // A mix of one part vinegar and one part water can be sprayed on your pets fur and rubbed in generously to the skin. Saturate the entire coat, and continue every day for a few days to a week. Any flea infestation should vanish. 

Feel free you send me an email or post a comment below with any questions.  

How do you use your Organic Raw Apple Cider Vinegar?


**Please consult a physician if you are taking any prescription medications or if you have any serious ailments, 
before starting any oral ORACV regimen.